Increasing efficiency throughout the PCB layout will accelerate the PCB design process. One way to do this is to use the toolbar in OrCAD X Presto to quickly access commands. The toolbar can be used to quickly select several commonly used commands such as:
- Routing
- Placing Components
- Adding Vias and Via structures
- Fanouts
- Delay and Phase Tuning
- Renumbering Reference Designators
- Moving Objects
- Copper Shapes and Pours
- Adding Comments
This quick how-to will provide step-by-step instructions on how to use the toolbar in OrCAD X Presto.
How-To Video
 Open in New Window
Adjusting the Toolbar Location
Step 1: Open the desired design or a blank design in OrCAD X Presto. The toolbar is visible on the left side of the PCB canvas and provides easy, centralized access to commonly used commands for your PCB designs.
Step 2: To customize the placement of the toolbar, click and drag to move the toolbar around the canvas. The toolbar can be free-floating or snapped to any of the four edges around the canvas.
Viewing Additional Commands
Note: By default, the Select mode is the first mode selected.
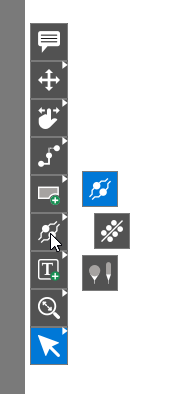
Step 3: Right-click any of the toolbar icons with an arrow in the top-right corner.
Step 4: A radial menu will open with additional modes. View the additional commands.
Step 5: Hover over any of the mode icons to view a tooltip of the mode name. This can be used if a specific icon is unknown.
Use the Toolbar in OrCAD X Presto
Step 6: Select the icon to activate a command. If a radial menu command was selected, that command’s icon will replace the default icon in the toolbar.
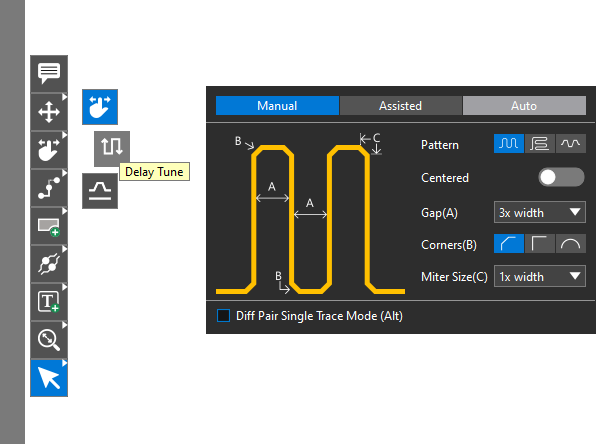
Step 7: Right-click the Slide icon and select Delay Tune. This will also display a hovering window to adjust settings for that mode.
Step 8: To end a mode, press Escape on the keyboard. Presto will return to the default Select mode.
Wrap Up & Next Steps
Quickly and efficiently use the toolbar in OrCAD X Presto to access and switch between common commands to expedite your PCB design process. Test out this feature and more with a free trial of OrCAD X Presto. For more how-tos and step-by-step walk-throughs, visit EMA Academy.
