Copying similar geometry in PCB designs for keepins, keepouts, planes, and more is a great way to accelerate the design process; however, this becomes harder as the designs increase in complexity. The new Paste Special command in OrCAD X Presto enables an easy copy and paste method for even the most complex geometries.
This quick how-to will provide step-by-step instructions on how to use the Paste Special command in OrCAD X Presto to copy geometry between layers.
To follow along, download the provided files above the table of contents.
How-To Video
 Open in New Window
Copy Geometry
Step 1: Open the provided design in OrCAD X Presto.
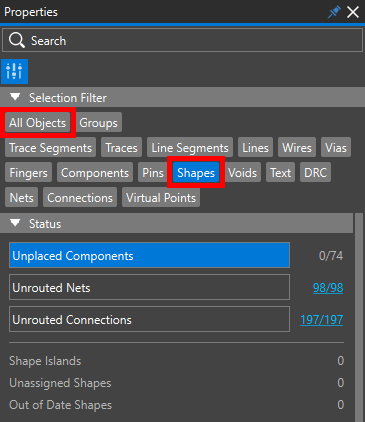
Step 2: In the Selection Filter subpanel of the Properties panel, select All Objects to disable all objects. Select Shapes to enable the selection of shapes.
Step 3: Select the board outline.
Step 4: Right-click the outline and select Copy. The board outline is copied.
Use the Paste Special Command in OrCAD X Presto
Step 5: Right-click anywhere in the canvas and select Paste Special.
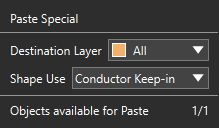
Step 6: The Paste Special widget opens, with a dropdown for Shape Use and Destination Layer. The shape is also attached to your cursor in the selected color. Select Conductor Keep-in from the Shape Use menu.

Note: The bottom of the widget shows the number of objects available to be pasted. If only one object qualifies, a warning triangle appears. If no objects qualify, a red error triangle appears.
Step 7: Select All for the Destination Layer.
Step 8: By default, copies created from Paste Special can snap directly to the original outline. Hover your cursor over the outline until the copy snaps.
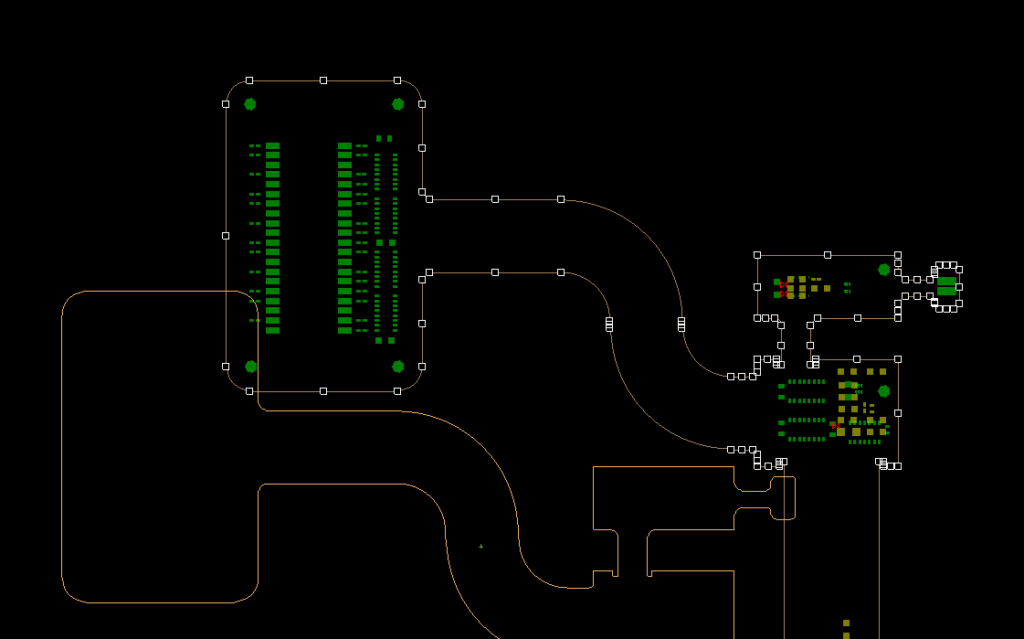
Step 9: Click to place the copy.
Configure Snapping in OrCAD X Presto
Note: In addition to snapping to the original version of the shape, the pasted geometry can also be snapped to vertices, centers, and midpoints.
Step 10: Select Snapping in the top-left corner of the canvas to open the Snapping panel.
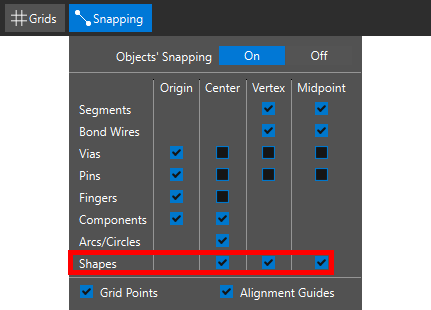
Step 11: Ensure the options for Center, Vertex, and Midpoint are checked for Shapes.
Step 12: Select Snapping again or click anywhere outside the panel to close it.
Use the Paste Special Command for Component Keep-ins
Step 13: Select Component Keep-in from the Shape Use dropdown and All for the Destination Layer.
Step 14: Hover your cursor over several corners and vertices on the board. The copy is snapped to each of them.
Step 15: Click to paste the conductor keep-in shape on the design outline.
Step 16: Press Escape on the keyboard to return to selection mode.
Wrap Up & Next Steps
Quickly and easily copy geometry between layers with the Paste Special command in OrCAD X Presto. Don’t have OrCAD X Presto? Get your free trial here, and for more step-by step instructions and walk-throughs on using OrCAD X Presto, visit EMA Academy.

