In today’s electronic designs, circuits have numerous components, often more than can fit on a single page. To improve readability, hierarchical designs are created to partition major functional regions of the design. Hierarchical schematics can contain combinations of hierarchical blocks or parts that refer to other schematics and, in some cases, can be many levels deep. To reference parts in another schematic, intersheet references must be used. Intersheet references indicate the source and destination of schematic page and schematic signals in your design, making it easier to trace signals and find errors in the electrical connectivity of your design.
This how-to will provide step-by-step instructions on how to create and use intersheet references in a complex hierarchical design with OrCAD Capture.
To follow along, download the provided files above the table of contents.
How-To Video
Opening a Hierarchical Design
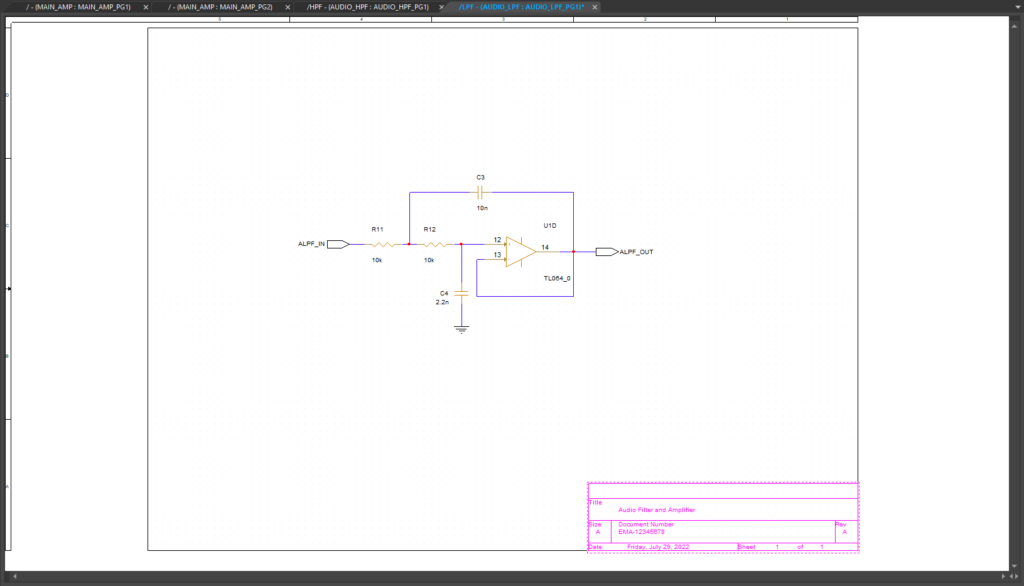
Step 1: Open the provided design, Audio_Filter_Amplifier.DSN,in OrCAD Capture 17.4.
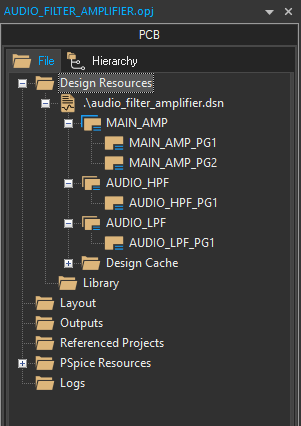
Step 2: Expand the design folder in the project hierarchy and expand the folders MAIN_AMP, AUDIO_HPF, and AUDIO_LPF.
Step 3: Double-click MAIN_AMP_PG1, MAIN_AMP_PG2, AUDIO_HPF_PG1, and AUDIO_LPF_PG1 to open the pages.
Adding Title Blocks
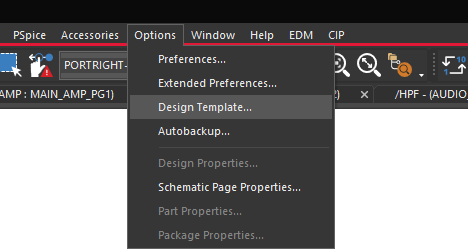
Step 4: Select Options > Design Template from the menu.
Step 5: Select the Title Block tab.
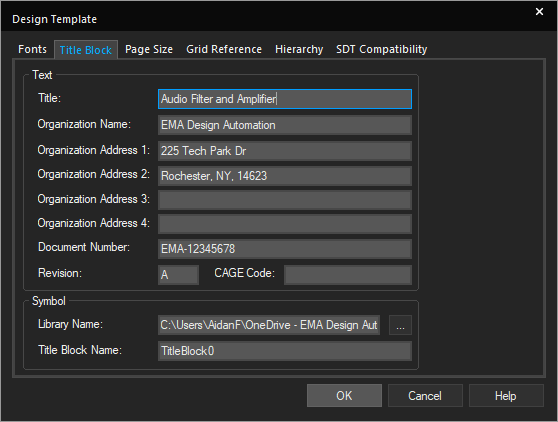
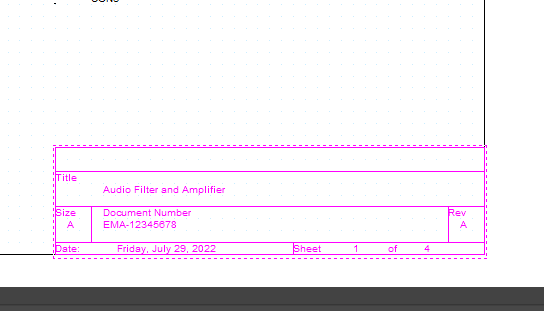
Step 6: In the Title field, enter Audio Filter and Amplifier. Fill in other title block fields as needed and click OK.
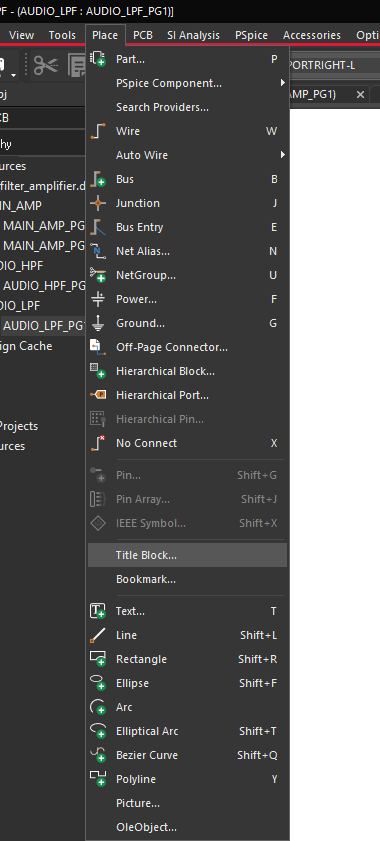
Step 7: Select Place > Title Block from the menu.
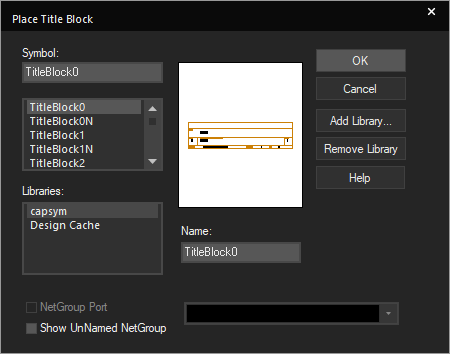
Step 8: Select the CAPSYM library from the library list and select TitleBlock0.
Note: If the CAPSYM library is not available as a title block library use the following steps:
- Select Add Library.
- Browse to the default library directory, C:\Cadence\SPB_17.4\tools\capture\library and select capsym.olb.
- Click Open.
The CAPSYM library will be added to the library list.
Step 9: Click OK to place the title block.
Step 10: Click to place the title block in the lower-right corner of the schematic page. Press Escape on the keyboard.
Step 11: Repeat steps 7 through 10 to place title blocks in each page.
Adding Page Numbers
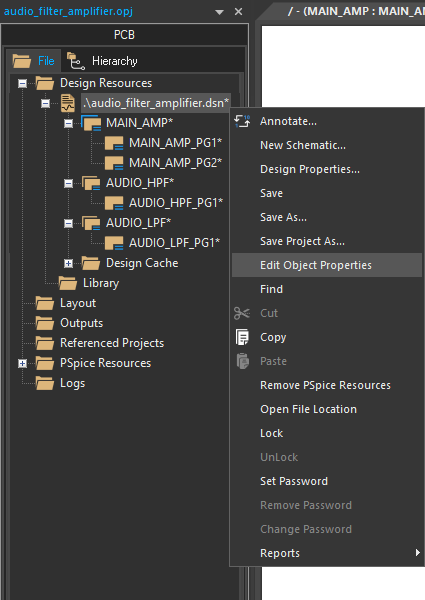
Step 12: Right-click the .dsn file at the top of the design hierarchy in the project manager and select Edit Object Properties.
Note: This will open the Property Editor tab.
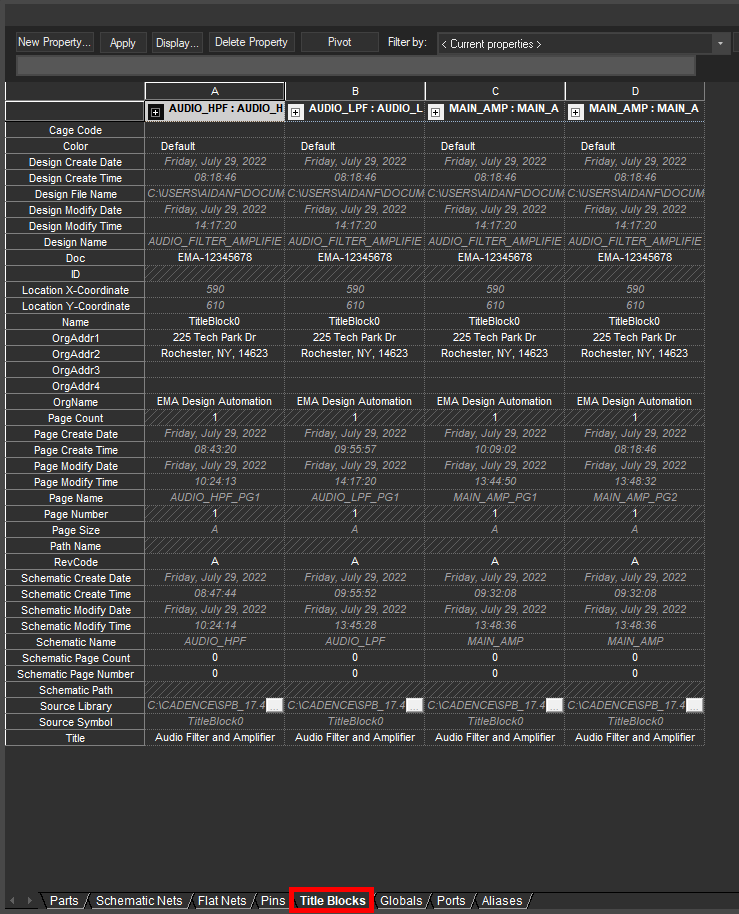
Step 13: Select the Title Blocks tab at the bottom of the window.
Note: The title blocks are arranged alphabetically by page name.
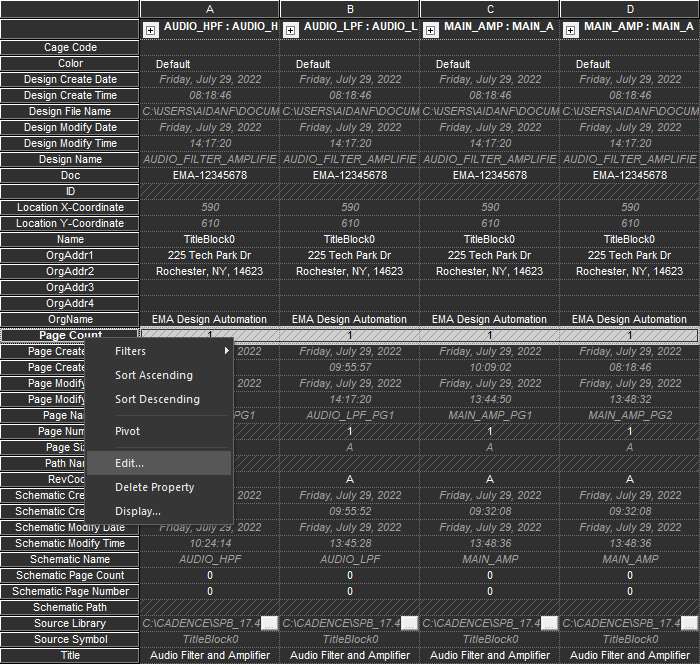
Step 14: Select the Page Count row, right-click and select Edit.
Step 15: Enter 4 for the Page Count and click OK.
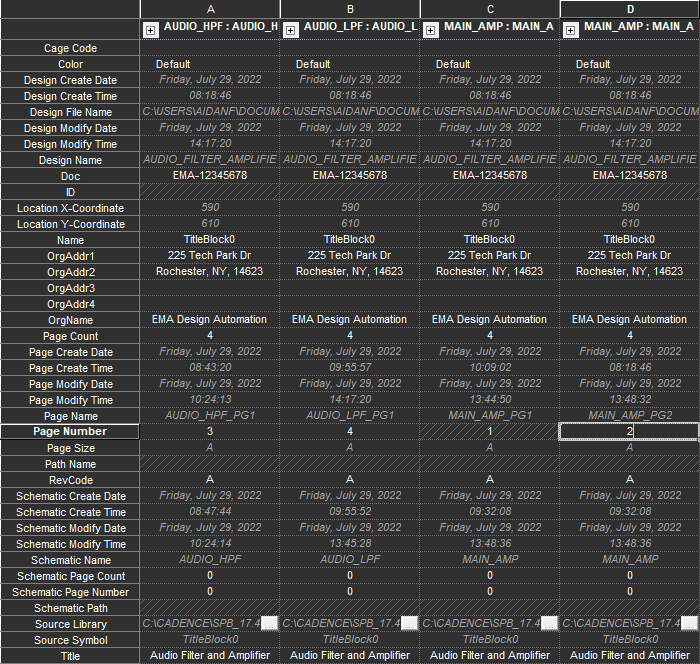
Step 16: In the Page Number row, assign the following page numbers:
- AUDIO_HPF: 3
- AUDIO_LPF: 4
- MAIN_AMP_PG1: 1
- MAIN_AMP_PG2: 2
Note: Page numbers must be defined before intersheet references can be created.
Step 17: Click Apply and close the Property Editor tab.
Note: Each title block has been updated with the correct page count and sheet number.
Adding Intersheet References
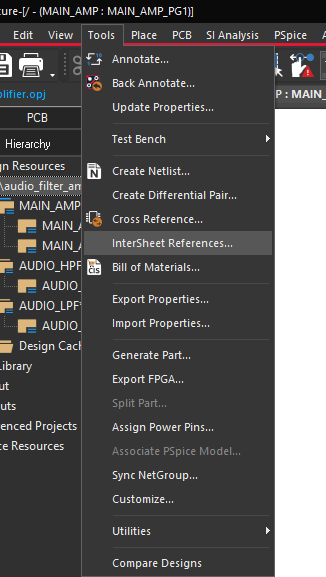
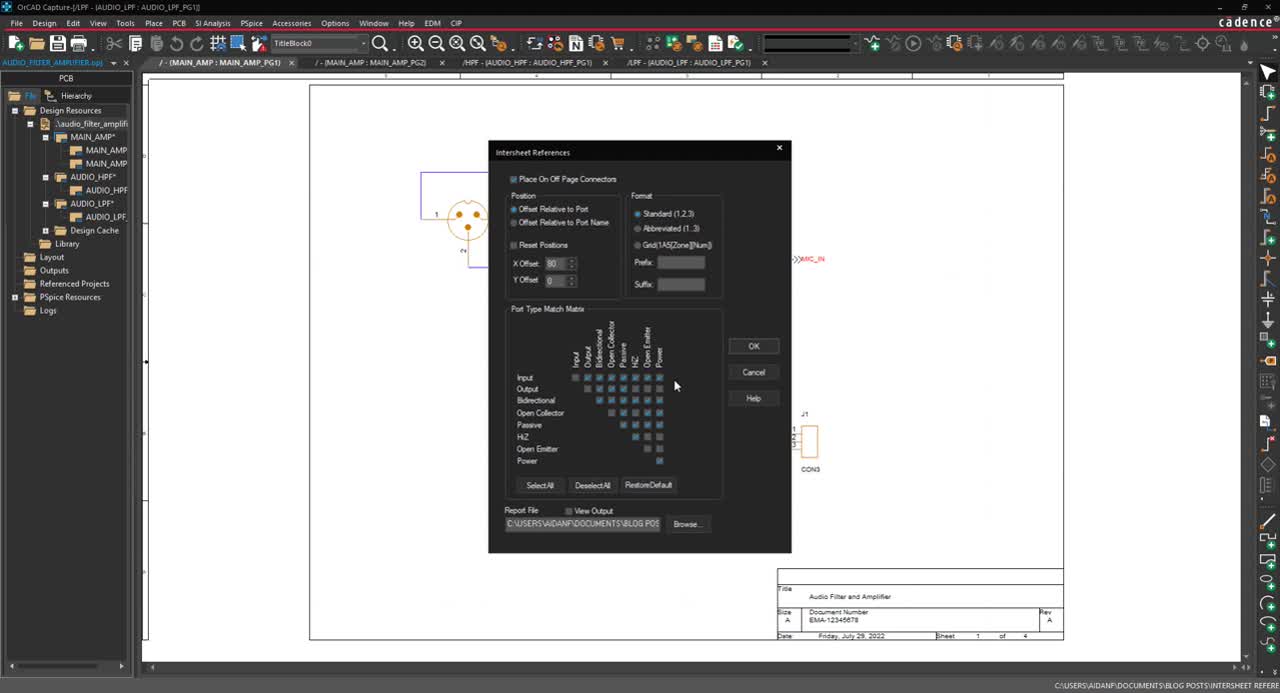
Step 18: With the .dsn file selected in the project hierarchy, select Tools > InterSheet References from the menu to open the Intersheet References window.
Step 19: A prompt will appear to save changes to the design. Click OK.
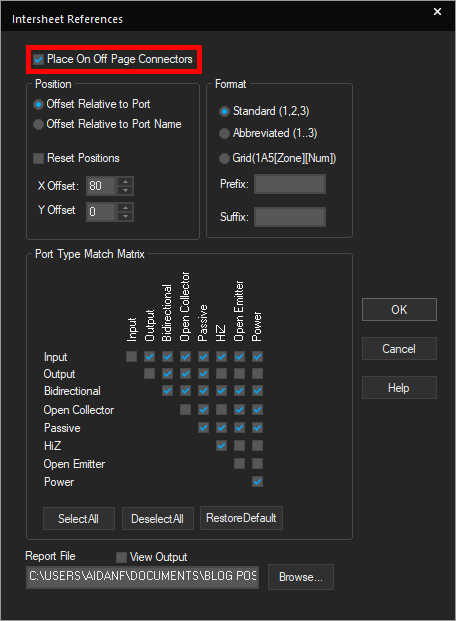
Step 20: Be sure Place On Off Page Connectors is checked to place the reference updates on the connectors.
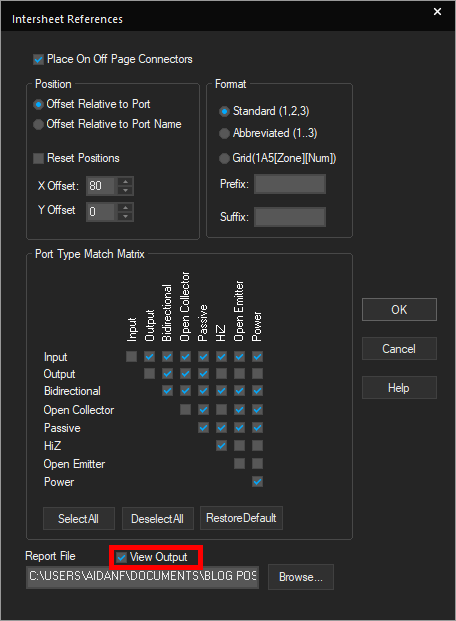
Step 21: Check View Output to view the output in Excel.
Step 22: Leave all other settings as the defaults and click OK to generate the intersheet references.
Viewing Intersheet References
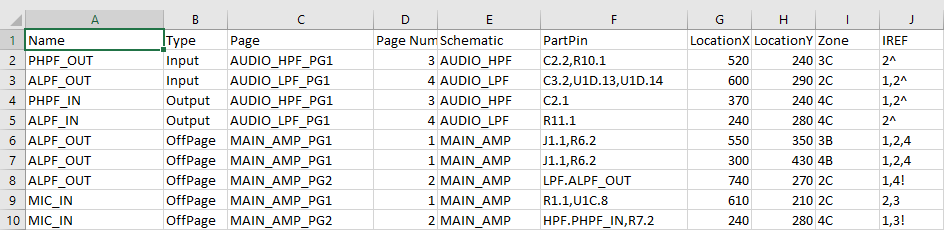
Step 23: Microsoft Excel will open showing a table of intersheet references.
Note: For each reference, the following information is reported:
- Type of signal (input, output, or off-page connector)
- The page on which the reference is defined, its page number and schematic
- The pins the reference connects to
- The location (x and y)
- The zone
- The other pages it is referenced on
An exclamation mark (!) indicates a page that is one level lower in the hierarchy and a caret (^) indicates a page that is one level higher.
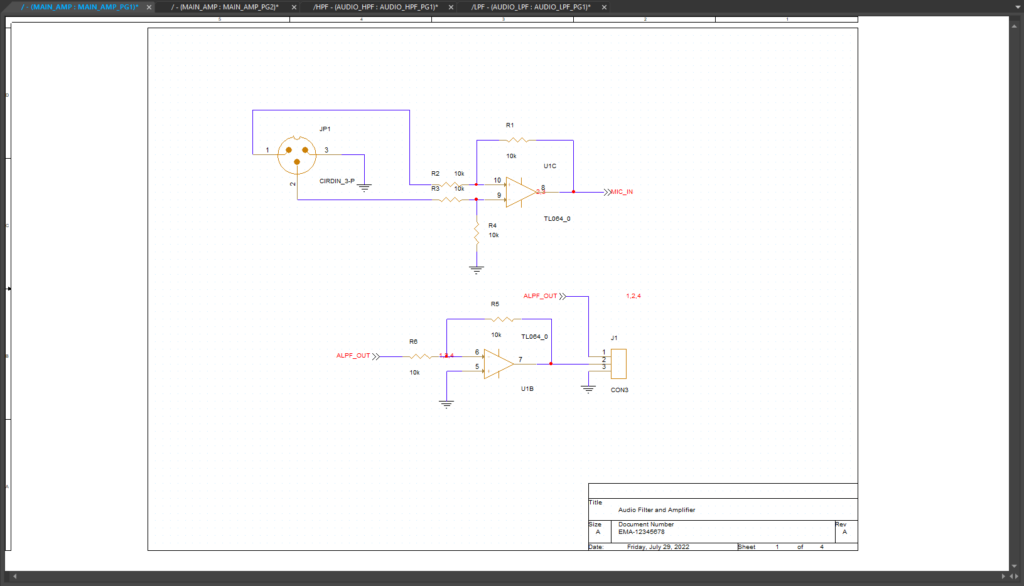
Step 24: Close Microsoft Excel and view the schematic.
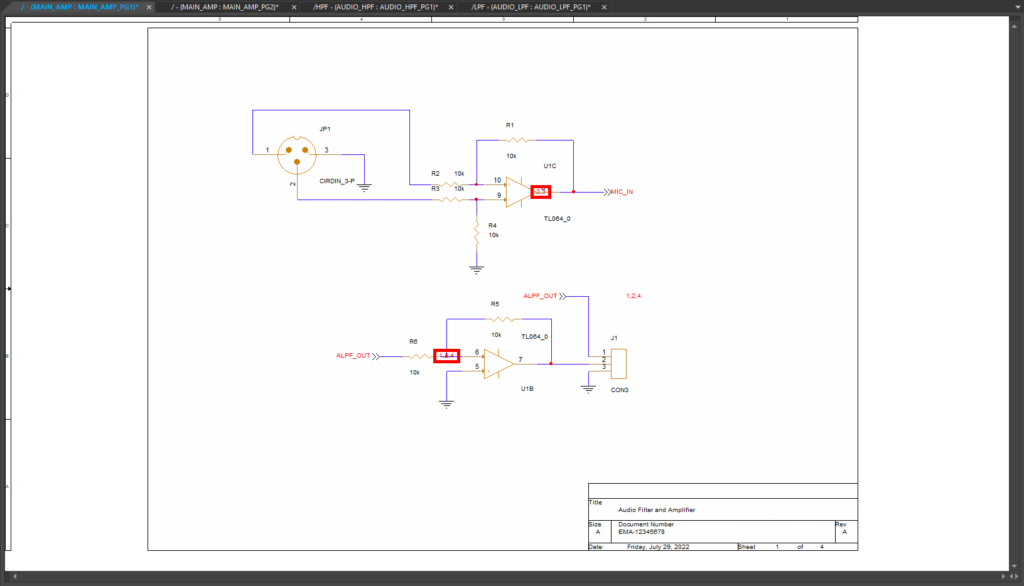
Note: The numbers on each relevant net indicate which page the net is referenced on.
Wrap Up & Next Steps
Easily configure intersheet references in complex hierarchical designs to improve readability, trace signals, and troubleshoot electrical connectivity throughout your designs with OrCAD Capture. Get started with a free trial of OrCAD to start creating your schematics efficiently.

