Today’s fast-paced and collaborative design environment has led to the rise of cloud workspaces to keep projects up to date for all stakeholders. However, design materials such as specification sheets and simulation models are not always kept in sync with the design, which can potentially lead to errors and prevent the design from being delivered on time or under budget. New in OrCAD X 24.1 is the ability to upload files to cloud workspaces, in addition to projects and libraries, to ensure all design materials are up to date.
This quick how-to will provide step-by-step instructions on how to upload files to a cloud workspace in OrCAD X Capture.
To follow along, download the provided files above the table of contents.
How-To Video
 Open in New Window
Creating a Shared Workspace
Step 1: Open OrCAD X Capture 24.1. Enter your OrCAD X username and password if prompted.
Step 2: Select View > Workspace > Configuration from the menu.
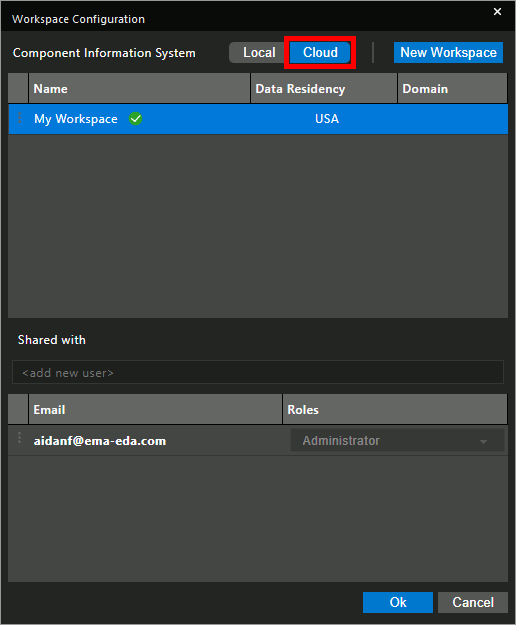
Step 3: Select Cloud for CIS Data Source.
Note: Select Local to work with the existing CIS database. For multi-user workspaces, users must set this option to Cloud.
Step 4: Select New Workspace to create a new workspace.
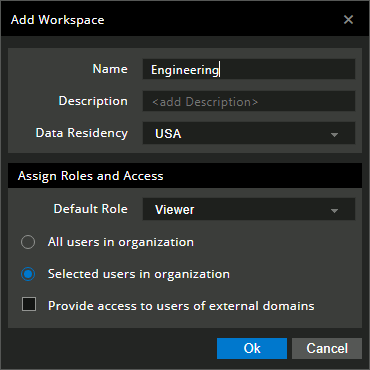
Step 5: The Add Workspace window opens. Enter Engineering into the Name field.
Step 6: Leave the other settings as the defaults and click OK.
Step 7: Click OK in the Workspace Configuration window to save the settings and close it.
Upload Files to your Personal Workspace
Note: All content uploaded to a cloud workspace must first be uploaded to your personal, local workspace.
Step 8: Select View > Workspace > File Manager from the menu or the File Manager button from the toolbar.
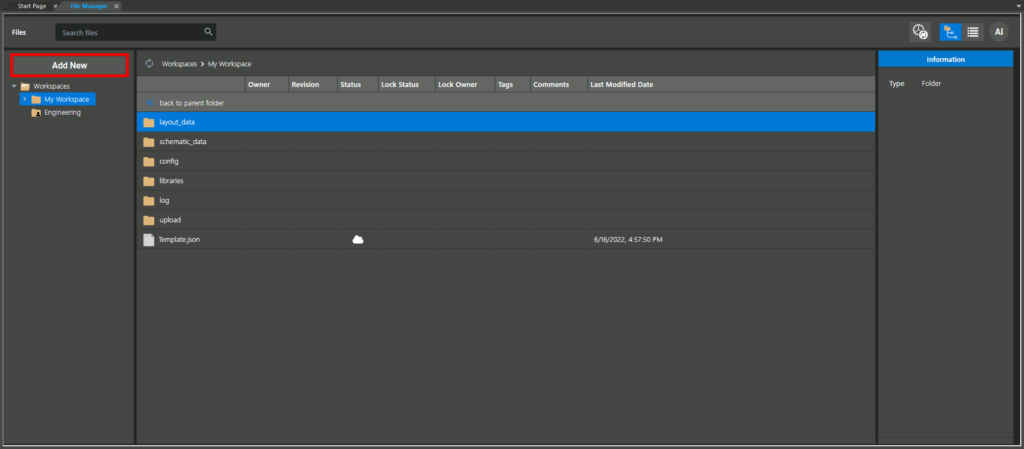
Step 9: The File Manager opens. Select My Workspace and Add New at the top of the workspace list.
Step 10: Select Upload File from the resulting dropdown.
Step 11: Browse to and select the provided lm21212-1_avg.lib file. Click Open.
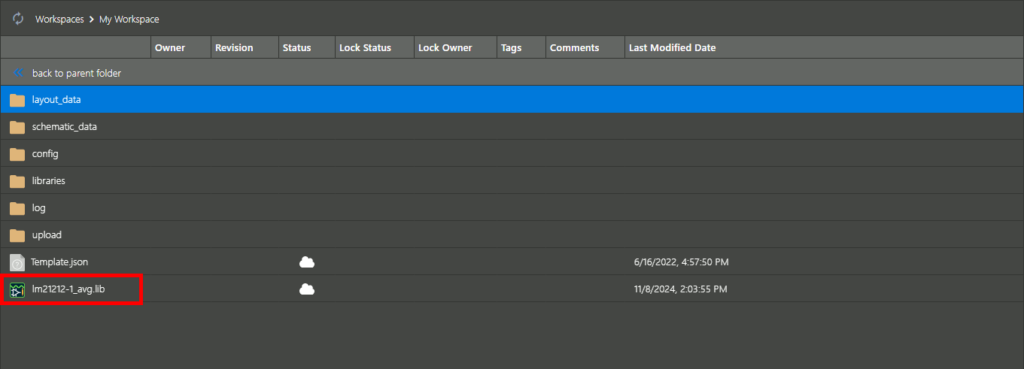
Step 12: View your personal workspace in the File Manager. The file has been added to the table.
Upload Files by Clicking and Dragging
Note: Files can also be added to a workspace by clicking and dragging.
Step 13: Open File Explorer and arrange it such that it forms a split screen with Capture.
Note: Alternatively, if your system has multiple monitors, put File Explorer in another monitor.
Step 14: Select the provided lm21212-1_avg.olb file.
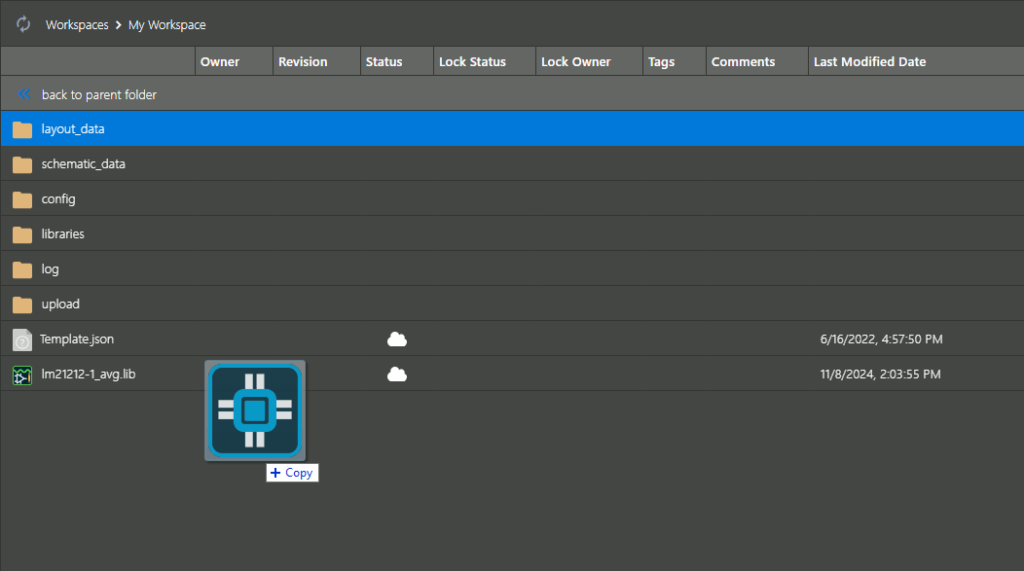
Step 15: Click and drag the file to hover it over the workspace in the File Manager. “Copy” appears under your cursor.
Step 16: Release the mouse button to drop the file in the workspace. Both LM21212 files have been added to your personal workspace.
Upload Files to a Cloud Workspace
Step 17: With the files added to your personal workspace, the next step is to upload files to a cloud workspace. Right-click one of the added files in the File Manager and select Publish.
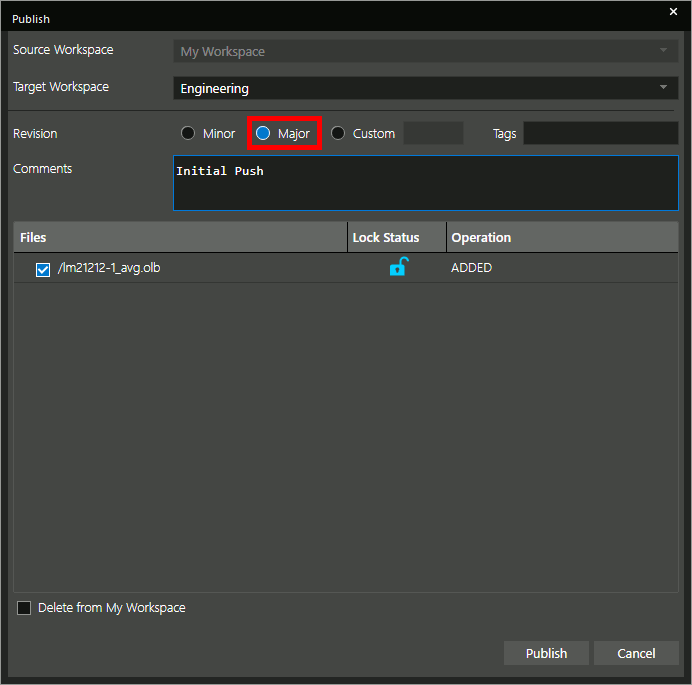
Step 18: The Publish window opens with Engineering already selected as the target workspace. Select Major for the revision and add a comment if desired.
Note: Check Delete from My Workspace to remove the part from your personal workspace.
Step 19: Click Publish to add the part to the Engineering workspace.
Note: If prompted that the destination workspace location is different from the source workspace location, click Yes to publish the part across locations.
Step 20: Right-click the other file and select Publish. Set the revision to Major, add a comment if desired, and click Publish.
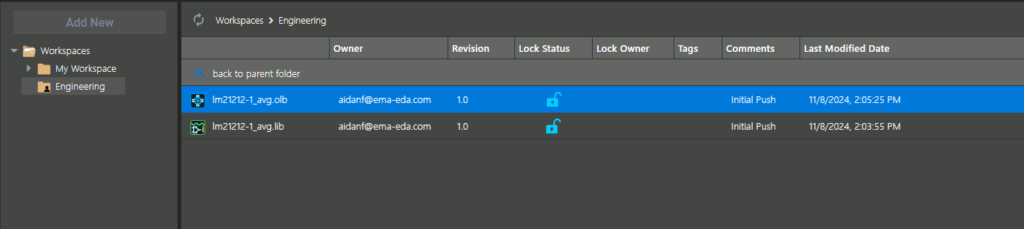
Step 21: Select the Engineering workspace from the list. Both files are shown in the workspace as unlocked and available for checkout.
Note: To learn more about checking in or out files from a cloud workspace in OrCAD X Capture, see our how-to here.
Wrap Up & Next Steps
Quickly and easily upload files to cloud workspaces for efficient collaboration in OrCAD X Capture. Test out this feature and more with a free trial of OrCAD. Want to learn more about OrCAD X? Get access to free how-tos, courses, and walk-throughs at EMA Academy.

