The display in any PCB layout can often become very busy with many things visible. Accidentally selecting the wrong object can, at best, lengthen the PCB design time, and at worst, lead to design errors and potential respins. OrCAD X Presto provides two easy methods to select objects accurately and efficiently in the PCB canvas with:
- Shortcut Keys
- The Selection Filter
This quick how-to will provide step-by-step instructions on how to select objects in OrCAD X Presto.
How-To Video
 Open in New Window
Select Objects in OrCAD X Presto with Shortcut Keys
Step 1: Open a design in OrCAD X Presto.
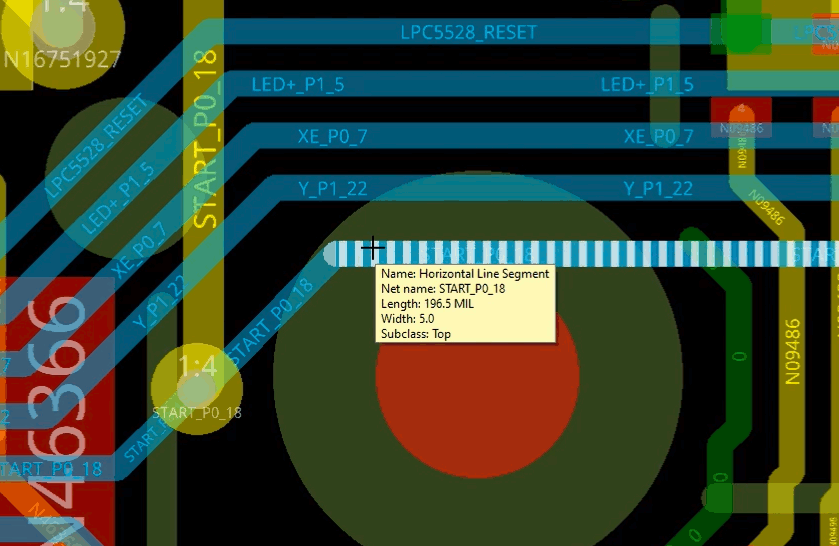
Step 2: Hover over an object in a crowded section of the board to prepare to select it.
Step 3: Press Tab on the keyboard to cycle through the selectable objects under the cursor.
Note: A tooltip will indicate which object is currently highlighted.
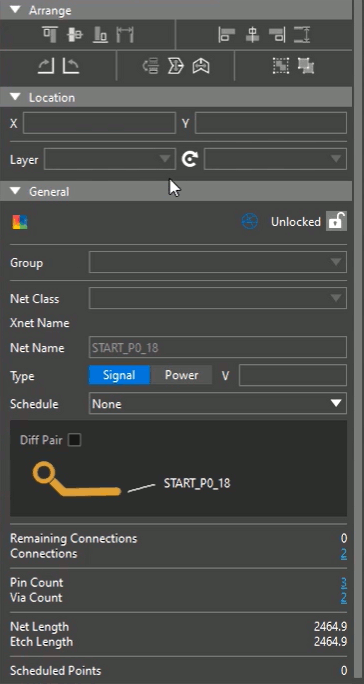
Step 4: Click to select an object. The Properties panel will populate with settings for that object. In this case, the Properties panel is populated with net options.
Step 5: With your cursor hovered over the object, press Tab and click again to select a different object.
Select Objects in OrCAD X Presto with the Selection Filter
Step 6: Click any blank section of canvas to deselect any selected objects.
Step 7: In the Properties panel, in the Selection Filter subpanel, select All Objects to turn all objects off.
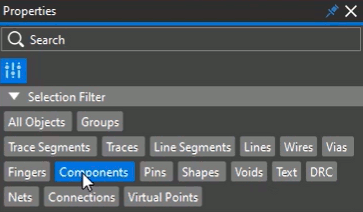
Step 8: Select the desired object to select, for example, Components, in the Properties panel.
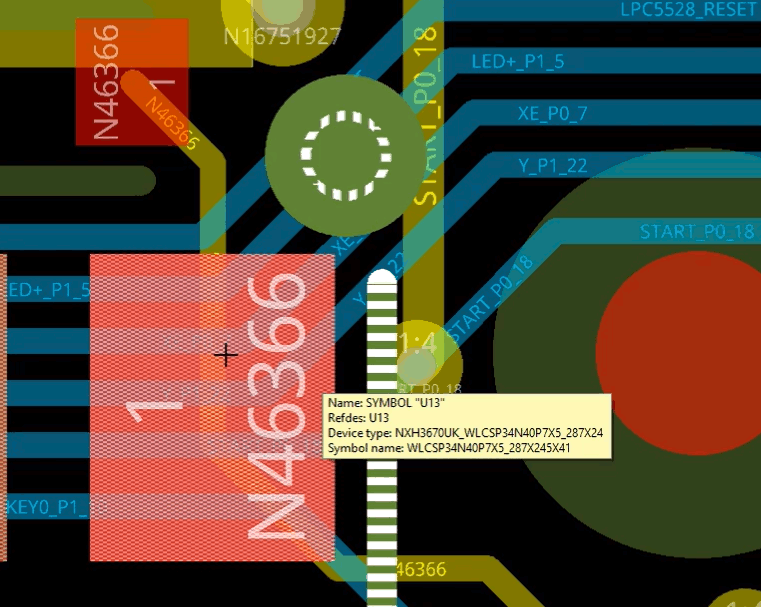
Step 9: Hover your cursor over the crowded section of the board. Only components can be highlighted and selected.
Wrap Up & Next Steps
Ensure only the desired components are selected with the Tab key and Selection Filter in OrCAD X Presto. Test out this feature and more with a free trial of OrCAD X Presto. For more how-tos and step-by-step walk-throughs, visit EMA Academy.