Identifying and tracking schematic modifications throughout the design process can be difficult, especially with multiple engineers working on the same project. Instead of wasting crucial hours scanning through the entire schematic to determine what changed, designers should spend their time focused on design creation. With OrCAD Engineering Data Management (EDM), differences between schematic revisions are automatically identified and reported graphically, improving collaboration and expediting schematic creation.
This how-to will provide step-by-step instructions for comparing versions of a schematic with the Design Compare functionality in OrCAD EDM.
How-To Video
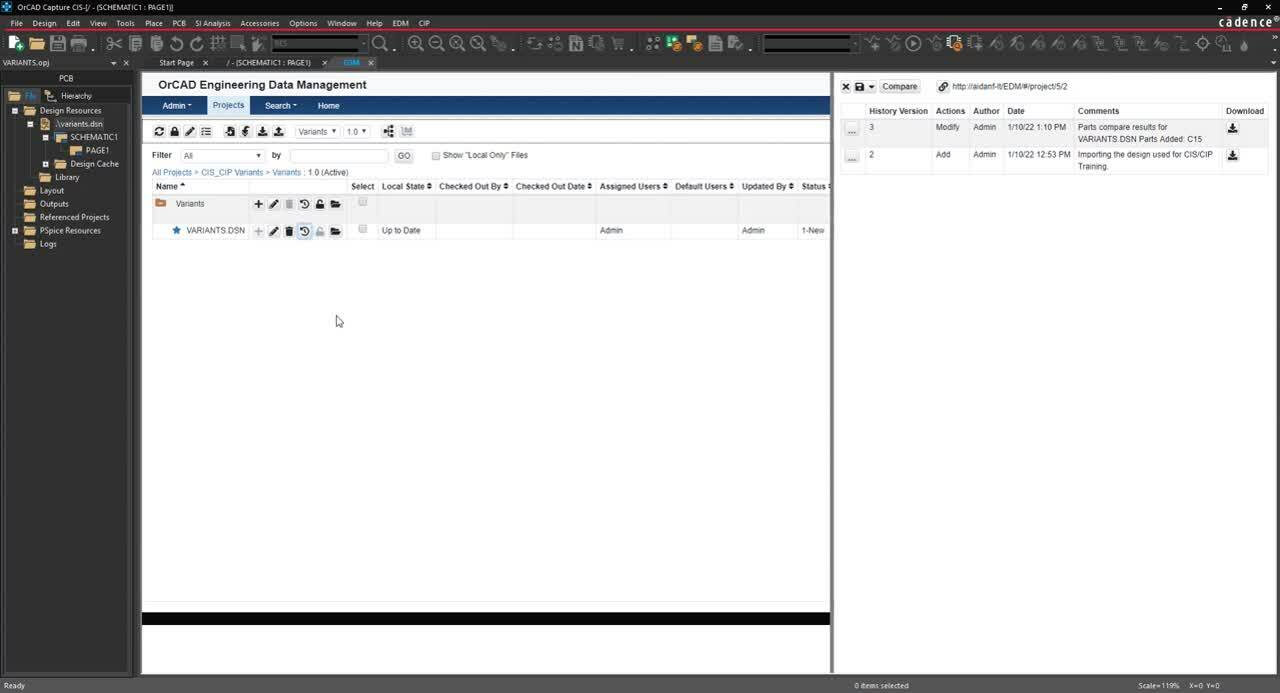
Opening OrCAD EDM
Step 1: Open OrCAD Capture 17.4.
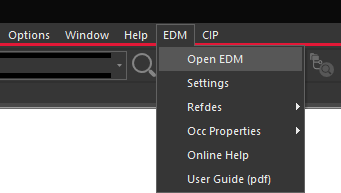
Step 2: Select EDM > Open EDM from the menu.
Step 3: Log in with your username and password.
Step 4: View and expand the desired project.
Comparing Design History
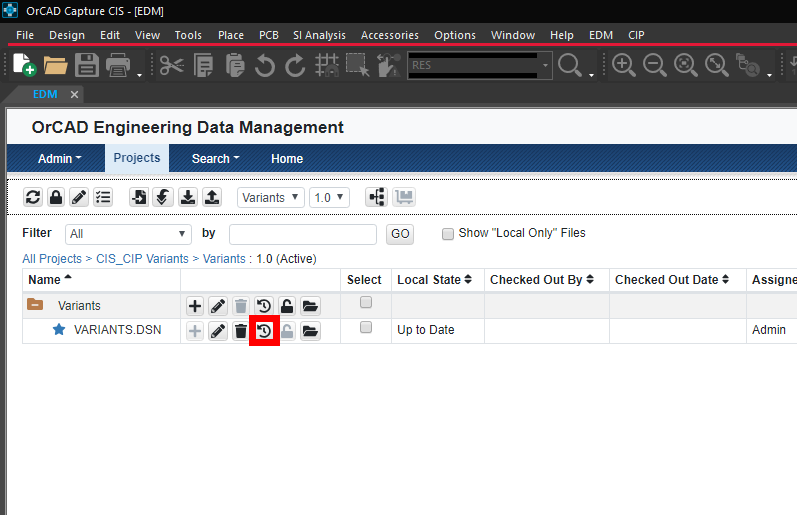
Step 5: Select the History button on the schematic design (.dsn).
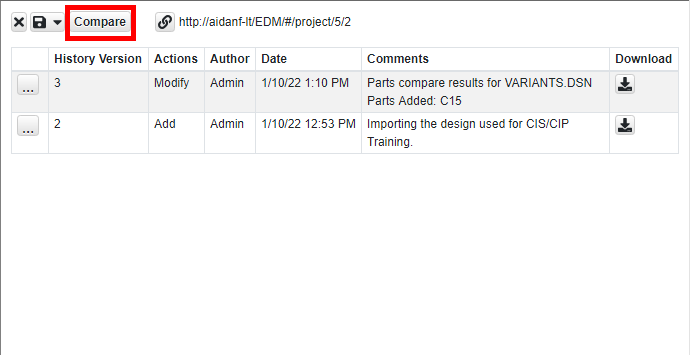
Step 6: In the History tab, select Compare.

Step 7: In the Compare History window, choose the desired versions to compare.
Note: Selecting Compare with working copy will compare the current version with an earlier revision.
Step 8: Click Compare.
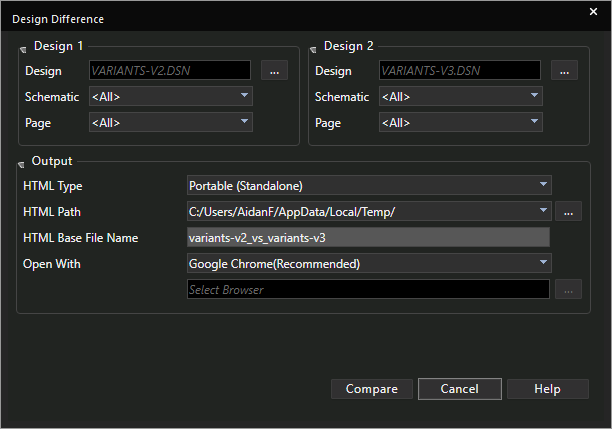
Step 9: In the Design Difference window, leave the defaults and click Compare.
Viewing Design Differences
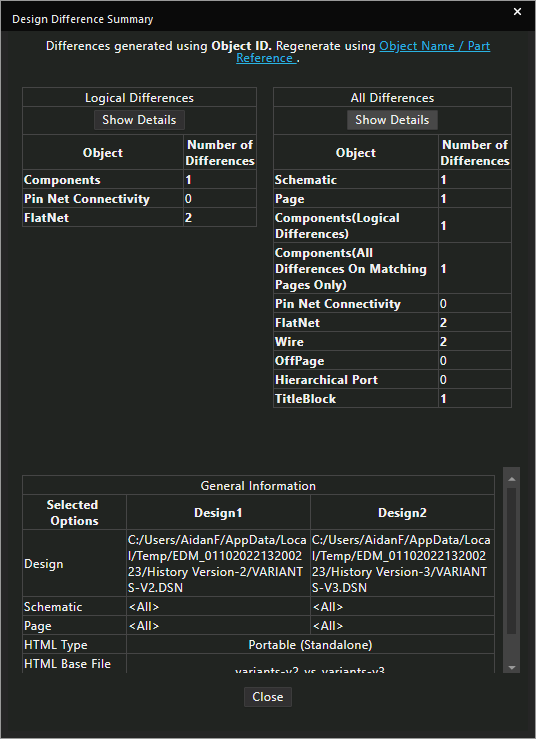
Step 10: View the Design Difference Summary.
Step 11: Select Show Details under All Differences.
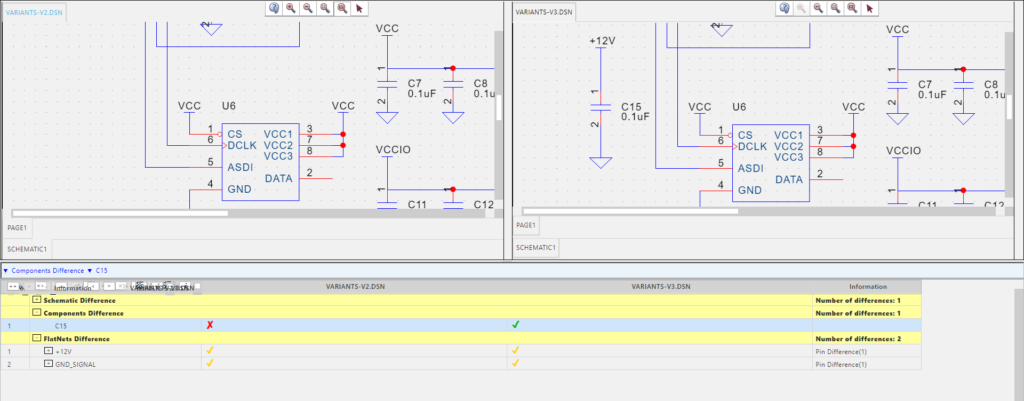
Step 12: A web browser window will open with both versions of the schematic.
Note: Differences are displayed graphically in the schematic and within a table. Expand the list of Component Differences to see detailed information on the changes between versions.
Wrap Up & Next Steps
Accelerate design creation and reviews by quickly identifying changes between schematic revisions with Design Compare in OrCAD Engineering Data Management. For more information and in-depth training on additional features, view our E-Learning and instructor led courses for OrCAD EDM.
