Before a PCB is put into production, performing SPICE simulations can make the difference between a pre-production revision and a costly board respin. Simulations, such as DC sweep, are essential to analyze potential faults, undesired circuit behavior, and even component failures. A DC sweep simulation can be used to analyze circuit behavior when specific parameters are varied during the simulation.
This quick how-to will provide step-by-step instructions on how to perform a DC Sweep simulation in OrCAD PSpice.
To follow along, download the provided materials above the table of contents.
How-To Video
 Open in New Window
Creating a DC Sweep Simulation Profile
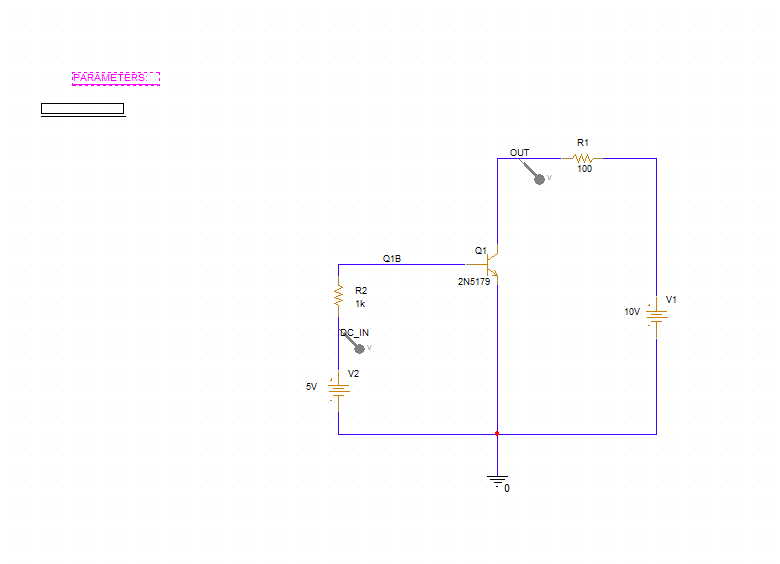
Step 1: Open the provided design in OrCAD PSpice Designer.
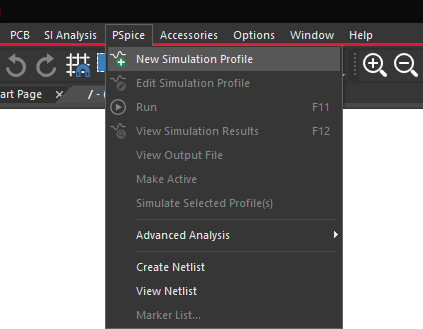
Step 2: Select PSpice > New Simulation Profile from the menu.
Step 3: Name the simulation profile DC_Sweep and click Create.
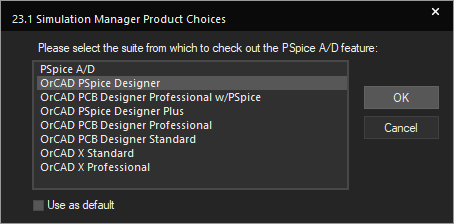
Note: If the Simulation Manager Product Choices window opens, select the appropriate license and click OK.
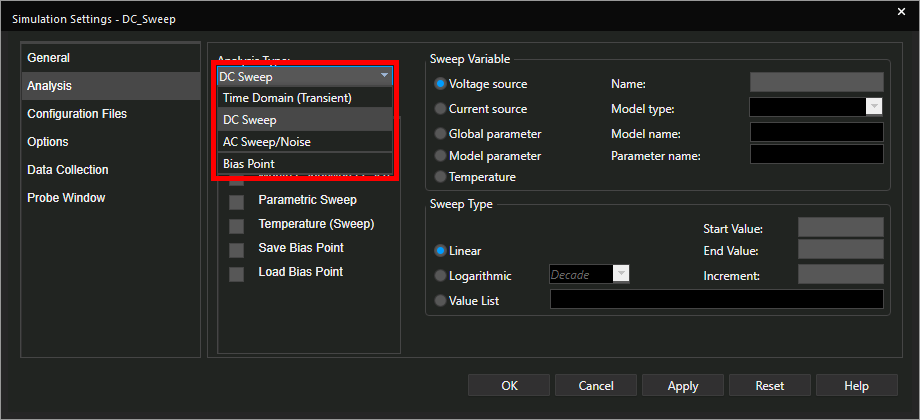
Step 4: Select DC Sweep from the Analysis Type drop-down menu.
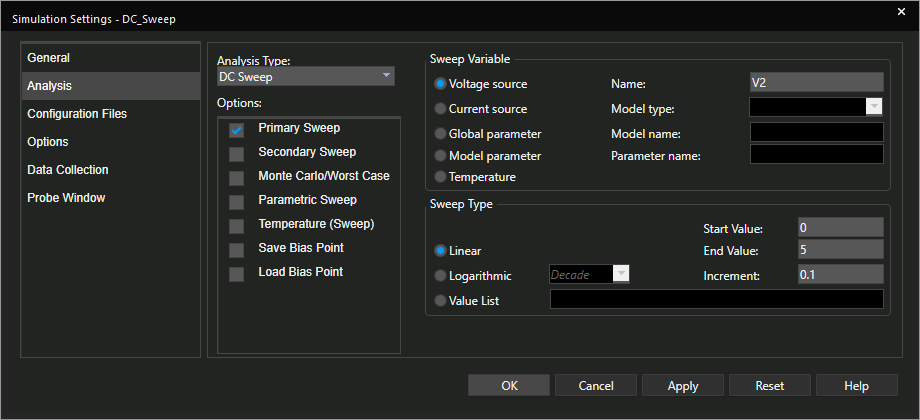
Step 5: Select Voltage Source for the Sweep Variable. Enter V2 for the name.
Step 6: Enter 0 for the Start Value, 5 for the End Value, and 0.1 for the Increment.
Step 7: Click OK to save the simulation settings.
Placing Probes
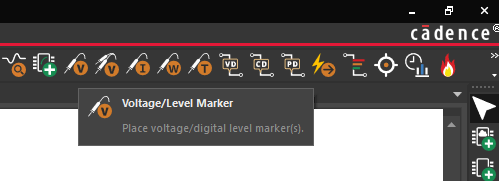
Step 8: Select the Voltage/Level Marker button from the toolbar.
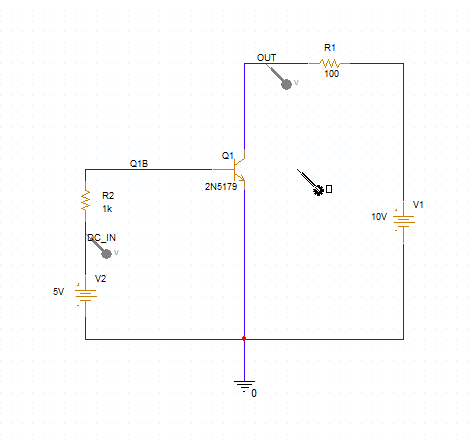
Step 9: Click to place probes on the DC_IN and OUT nodes. When finished, right-click and select End Mode.
Performing a DC Sweep Simulation
Step 10: Select PSpice > Run from the menu or the Run button on the toolbar to start the simulation.
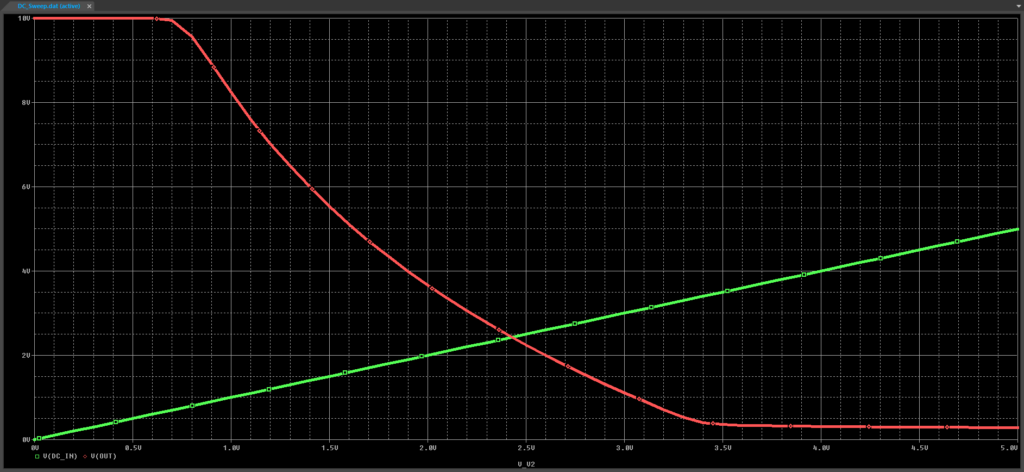
Step 11: The PSpice A/D window opens. View the simulation results. The DC_IN input rises throughout the sweep. The voltage at node OUT holds at 10V until the input voltage is around 0.65V, at which point it starts decreasing.
Step 12: Close the PSpice A/D window.
Configuring a Parameter Sweep
Note: DC Sweeps are not limited to voltages. Any parameter in the schematic can be swept.
Step 13: Select Place > Component from the menu.
Step 14: The Component Explorer tab opens. Select PSpice in the Categories list.
Step 15: Enter PARAM into the Search field and press Enter on the keyboard.
Step 16: Select the PARAM part. Right-click and select Place to place it.
Step 17: Click to place the PARAM part in the schematic. Right-click and select End Mode.
Step 18: Double-click the part to open the Property Editor tab.
Step 19: Select New Property to add a new property.
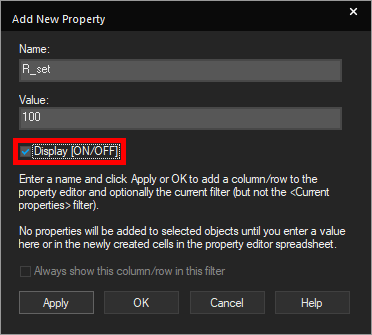
Step 20: Name the property R_set and enter 100 for the value. Check Display [ON/OFF] and click OK. This will create a variable with default value 100.
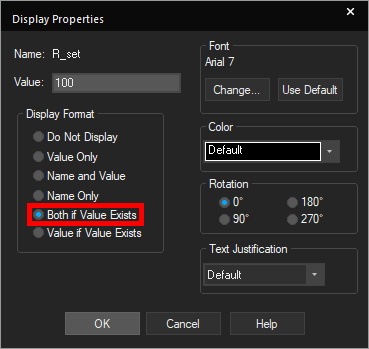
Step 21: The Display Properties window opens. Select Both if Value Exists to display the value in the schematic. Click OK.

Step 22: Click Apply and close the Property Editor tab. The parameter is now visible in the Parameters list.
Step 23: In the schematic, double-click the value of R1 to change it.
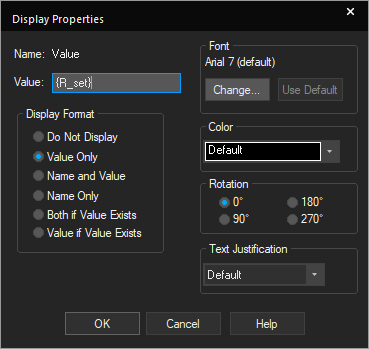
Step 24: Enter {R_set} for the value and click OK.
Note: Curly brackets indicate a variable.
Simulating a Parameter Sweep
Step 25: Select PSpice > Edit Simulation Profile from the menu.
Step 26: The Simulation Settings window opens. Select Global Parameter as the Sweep Variable.
Step 27: Enter R_set for the parameter name.
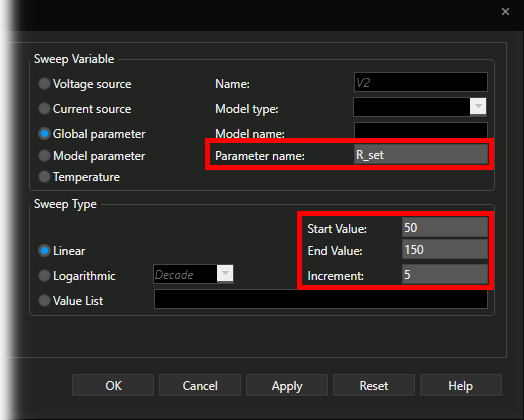
Step 28: Enter 50 for the Start Value, 150 for the End Value, and 5 for the Increment. Click OK.
Step 29: Select PSpice > Run from the menu.
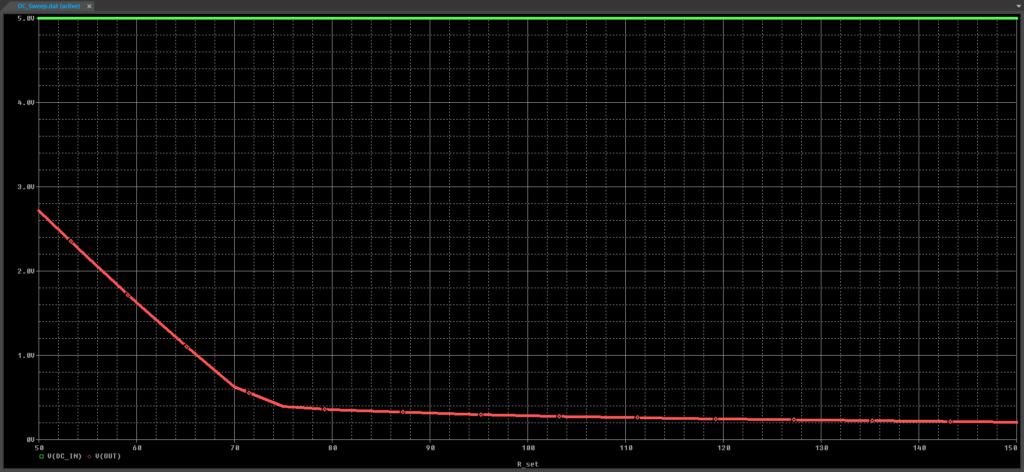
Step 30: View the results. As the resistance is swept, the output voltage drops.
Wrap Up & Next Steps
Perform a DC sweep simulation to confirm circuit behavior across a wide range of parameters in PSpice. Test out this feature and more with a free trial of OrCAD. Want to learn more about PSpice? Get access to free how-tos, courses, and walk-throughs at EMA Academy.

