Translating PCB designs between CAD tools can be difficult due to:
- Varying File Formats
- Feature Differences
- Design Customization
- Complex Data Structures
- Semantic Differences
While the number of design translations should be mitigated due to the possibility of errors, sometimes it is unavoidable when collaborating with team members or contract manufacturers, migrating design tools, utilizing reference designs, or leveraging previously developed intellectual property (IP). Easily import Eagle into OrCAD X Presto to reuse existing data and accelerate your PCB layouts.
This quick how-to will provide step-by-step instructions on how to import Eagle in OrCAD X Presto.
To follow along, download the provided files above the table of contents.
How-To Video
 Open in New Window
Configure Settings to Import Eagle into OrCAD X Presto
Step 1: Open a blank layout in OrCAD X Presto.

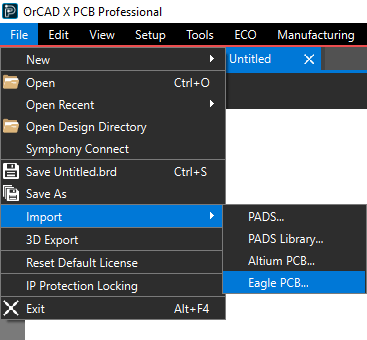
Step 2: Select File > Import > Eagle PCB from the menu.
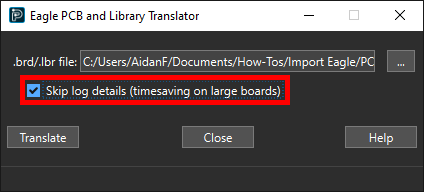
Step 3: In the Eagle PCB and Library Translator window, select the ellipsis to load an Eagle board file.
Step 4: Browse to and select the provided file, UNO-TH_Rev3e. Click Open.

Step 5: To save time on larger designs, check Skip Log Details to skip importing the Eagle log data.
Import Eagle into OrCAD X Presto
Step 6: Select Translate.
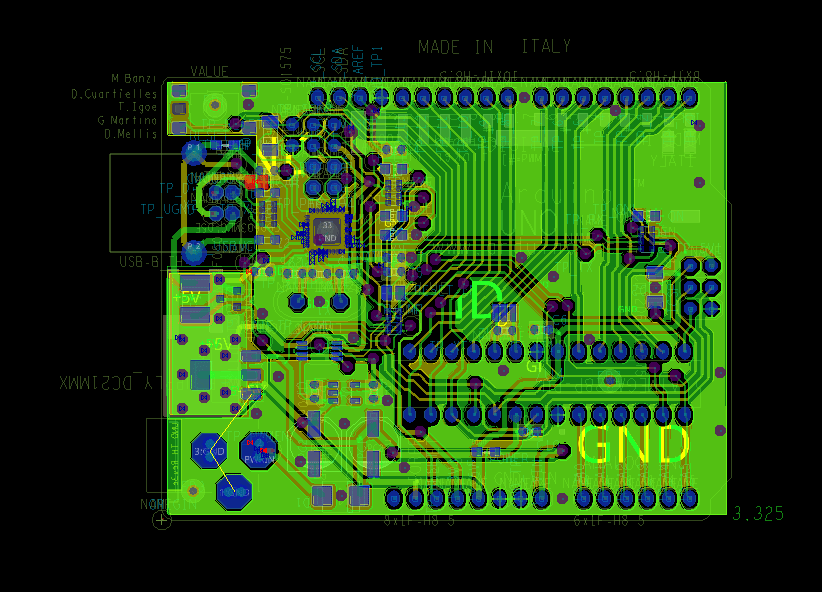
Step 7: When the translation and import finishes, the board design opens in the Presto canvas. A log file opens, showing the data that was generated. View and close the log file.

Step 8: View the design in the Presto canvas. The design has been imported as it was drawn in Eagle. Review and correct errors as needed.
Wrap Up & Next Steps
Quickly import Eagle into OrCAD X Presto to reuse IP and accelerate your PCB designs. Test out this feature and more with a free trial of OrCAD X Presto. For more how-tos and step-by-step walk-throughs, visit EMA Academy.
