In a complex design, there may be numerous instances of the same component on a circuit board. In certain scenarios, it may be necessary to find similar components with searching to:
- Place similar components
- Select an alternate PCB footprint
- Make a change to a padstack
- Renumber reference designators
- Define or modify a group for the components
- Change or define the Part Class (IC, Discrete, etc.)
OrCAD X Presto provides methods for searching that can be used to find and filter similar components:
- A Wildcard Search to identify components by common feature such as part number or footprint.
- Select on Canvas can be used to highlight and select any component found through the Search panel.
- Show in Search Results can be used after selecting a component to find components with the same part number.
This quick how-to will provide step-by-step instructions on how to find similar objects in a design with the Select on Canvas, Show in Search Results, and Wildcard Search features in OrCAD X Presto.
To follow along, download the provided materials above the table of contents.
How-To Video
 Open in New Window
The Search Panel in OrCAD X Presto
Step 1: Open the provided design in OrCAD X Presto.

Step 2: Select the Search button at the bottom of the window or View > Panels > Search from the menu.

Step 3: The Search panel can be docked so it will not automatically close during the search process. Select the Auto Hide button to disable auto hide.
Note: The button turns blue when auto hide is turned off.
Placing Components in OrCAD X Presto
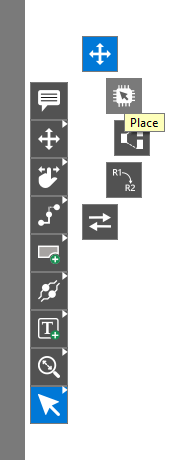
Step 4: Right-click the Move mode in the toolbar and select Place.
Step 5: Select Series in the Place widget to place objects one at a time.
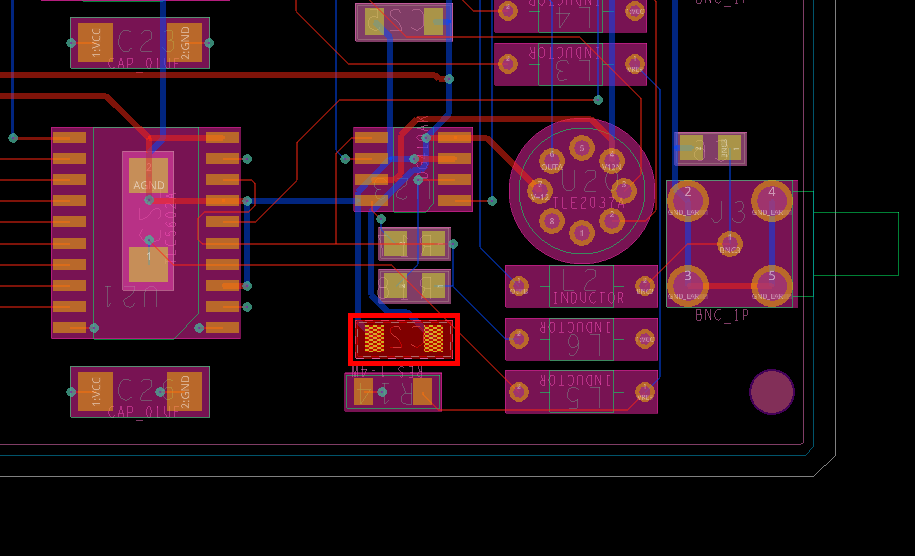
Step 6: Select capacitor C28 in the bottom-right corner of the board.
Step 7: The capacitor is attached to the cursor. Press Escape on the keyboard to release it. The capacitor properties are now listed in the Properties panel.
Find Similar Components with Searching
Note: The Search panel can be used to place similar components.
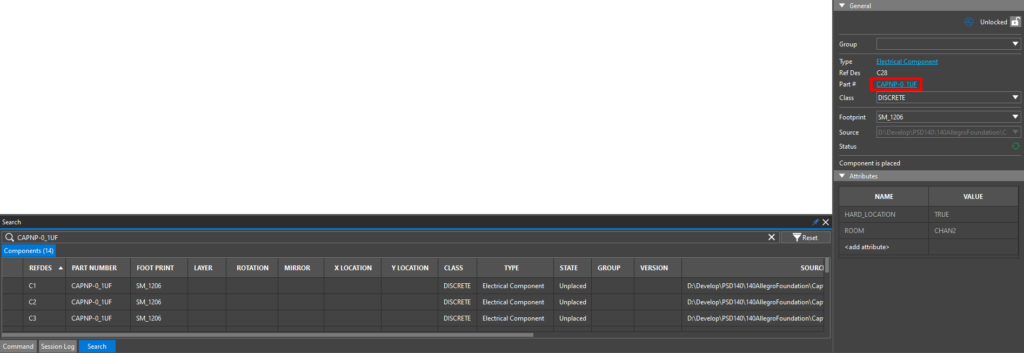
Step 8: Click the hyperlinked part number to search for parts with the same number. The matching parts are listed.

Step 9: Hover over the State column header and select the filter symbol.
Step 10: A new subpanel opens with additional search options and a text field. Select the Filter List Icon.
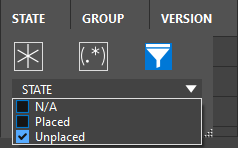
Step 11: Check Unplaced in the State drop-down menu. Click OK.
Step 12: View the Search panel. Only unplaced components with part number CAPNP-0_1UF are listed.
Placing Components in Series in OrCAD X Presto
Step 13: Highlight all the capacitors listed in the search results or use CTRL+ A on the keyboard. Move the cursor onto the canvas.
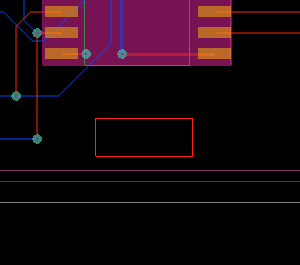
Note: A red outline indicates where the component is to be placed.
Step 14: Click to place a smoothing capacitor for U1.
Note: By default, all components are placed on the top layer. These capacitors will be moved to the bottom layer in the next section.
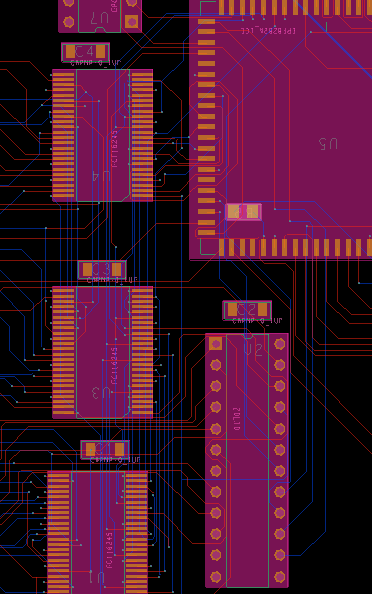
Step 15: The next component is attached to the cursor. Click to place the remaining smoothing capacitors for U2-U4. Press Escape on the keyboard when finished.
Modifying Component Properties
Step 16: Select Reset in the Search panel to clear all search filters.
Step 17: Select the filter symbol for the RefDes column header.
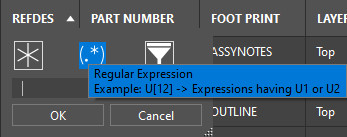
Step 18: Select the Regular Expression option.
Step 19: Enter C[1234] into the text field and click OK. This will filter only capacitors with designators starting with 1, 2, 3, or 4.
Step 20: Click and drag to select the cells under Layer for C1-C4.
Step 21: Right-click a selected cell and select Edit.
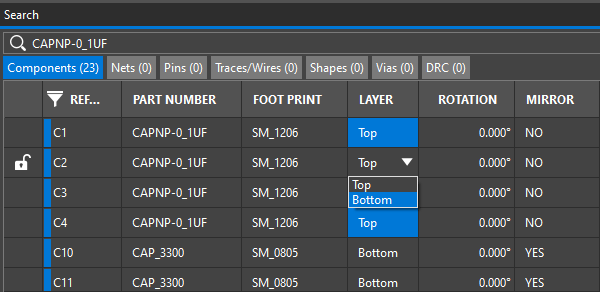
Step 22: Select Bottom from the resulting dropdown.
Step 23: Click in a cell outside the selected cells. All selected capacitors are moved to the bottom layer.
Note: DRCs may be generated if the capacitors overlap any blue bottom traces. Click and drag to adjust the capacitors as needed.
Assigning Component Groups
Step 24: Select the filter symbol for the RefDes column header.
Step 25: Clear the search field and click OK.
Step 26: Hover over the header for the Class column and select the filter symbol.
Step 27: Enter IO into the text field and click OK. This will search for all components in class IO.
Step 28: J1, J2, and J3 are listed. Select the reference designator for J2 in the table to select the BNC connector.
Step 29: Click and drag the cells under the Group column for J2 and J3.

Step 30: Enter BNC_IO on the keyboard and click outside the cells. The group BNC_IO is assigned to both components.
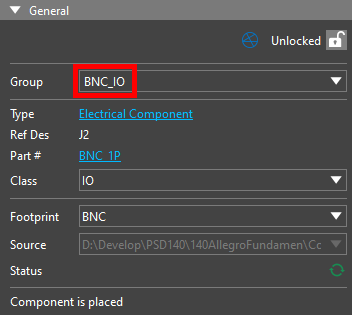
Step 31: View the Group dropdown under the General tab in the Properties panel. BNC_IO is selected as the group.
Step 32: Select Reset to remove all filter settings.
Finding Similar Components
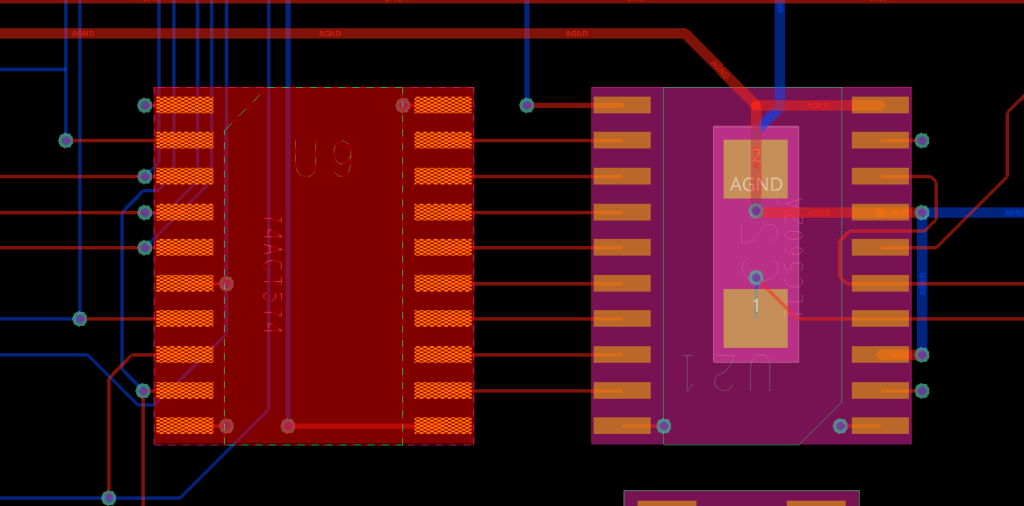
Step 33: Select IC U9 on the PCB canvas.
Step 34: Under General, in the properties panel, select the part number.

Note: The Search panel is automatically populated with the part number and all components with the same part number. U6, U8, and U9 are listed.
Step 35: Click and drag to select the cells under the Foot Print column for all three ICs.
Step 36: Right-click one of the cells and select Edit.
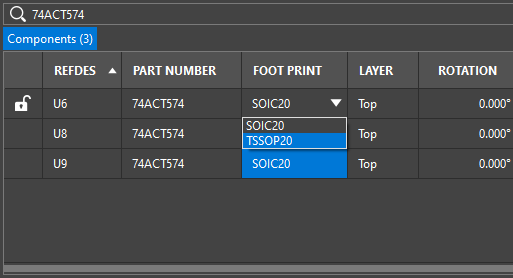
Step 37: Select TSSOP20 from the dropdown and click outside the cells to deselect.
Note: Learn how to assign alternate footprints within your OrCAD X Capture schematics here.
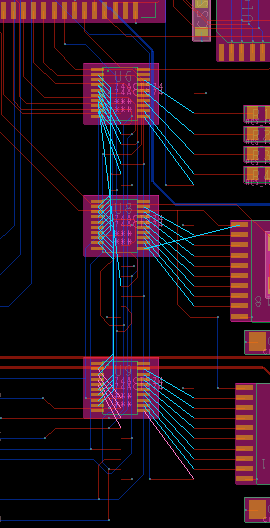
Step 38: View the results in the schematic. U6, U8, and U9 have been changed to smaller TSSOP packages.
Step 39: Clear the search field and press Enter to list all components.
Wrap Up & Next Steps
Quickly and easily find similar components with the various searching options in OrCAD X Presto. Test out this feature and more with a free trial of OrCAD X Presto. For more how-tos and step-by-step walk-throughs, visit EMA Academy.