With any design software tool, having an accessible and navigable environment is key for efficient design creation and review. The ideal design environment is completely customized to the designer’s preference. AWR allows you to customize your RF simulation environment to increase productivity with:
- A larger work area, giving the designer more space and significantly expedite the design process.
- A custom color scheme to create familiarity when transitioning between tools.
- Custom keyboard shortcuts essentially automating tedious commands and accelerating the design process.
This quick how-to will provide step-by-step instructions on how to customize your AWR RF simulation environment by expanding the workspace, changing default colors, and adding keyboard shortcuts.
How-To Video
 Open in New Window
Customize your AWR RF Simulation Environment
Step 1: Open a blank project in AWR Design Environment.
By default, the AWR workspace has:
- A Project panel on the left with tabs for Elements and Layout at the bottom
- A Status Window panel at the bottom showing error and warning messages as well as general information.
The available workspace is shown in gray.

Step 2: Select the Auto Hide button on the Status Window and Project panel toolbars. Tabs to activate the panels are now on the border of the window and the available workspace is much larger.

Note: These settings are retained when AWR Design Environment is closed. Hover your mouse over a tab to open the panel.
Changing Default Colors
Note: By default, all canvases in AWR Design Environment have a white background with a black grid. A separate color scheme can be defined for each type of canvas, such as schematics, system diagrams, and global definitions to improve usability.
Step 3: Select Options > Environment Options from the menu.
Step 4: The Environment Options window opens. Select Colors.
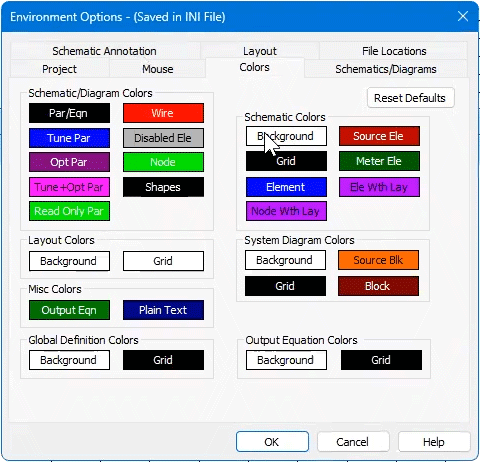
Step 5: In the Colors tab, select the color for Background to change it.
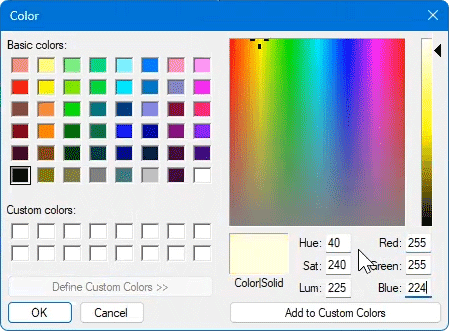
Step 6: Select a color from the Color window and click OK.
Note: Select Define Custom Colors to use a custom color.
Step 7: Back in the Colors tab, select the color for Grid to change it.
Step 8: Select the desired color from the Color window and click OK.
Step 9: Click OK in the Colors tab.
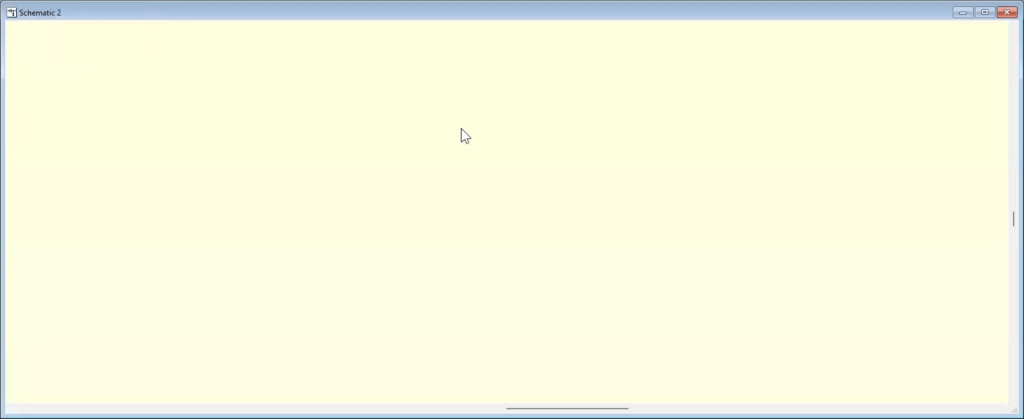
Step 10: View the results. The background and foreground grids have been adjusted to the color(s) you picked.
Note: These color preferences are retained for the next session of AWR Design Environment.
Configuring Keyboard Shortcuts
Note: Keyboard shortcuts can greatly accelerate the design process by reducing mouse-clicks and streamlining commonly used commands.
Step 11: Open a schematic with an S Parameter graph in AWR Design Environment.
Step 12: Select Window > Tile Vertical from the menu to tile the windows within the canvas.
Step 13: Select Simulate from the menu and View the Analyze command on the menu. F8 is the currently defined shortcut key for this command.
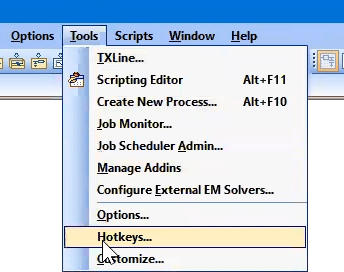
Step 14: Select Tools > Hotkeys from the menu. The Customize window opens, showing the list of available commands and defined hotkeys.
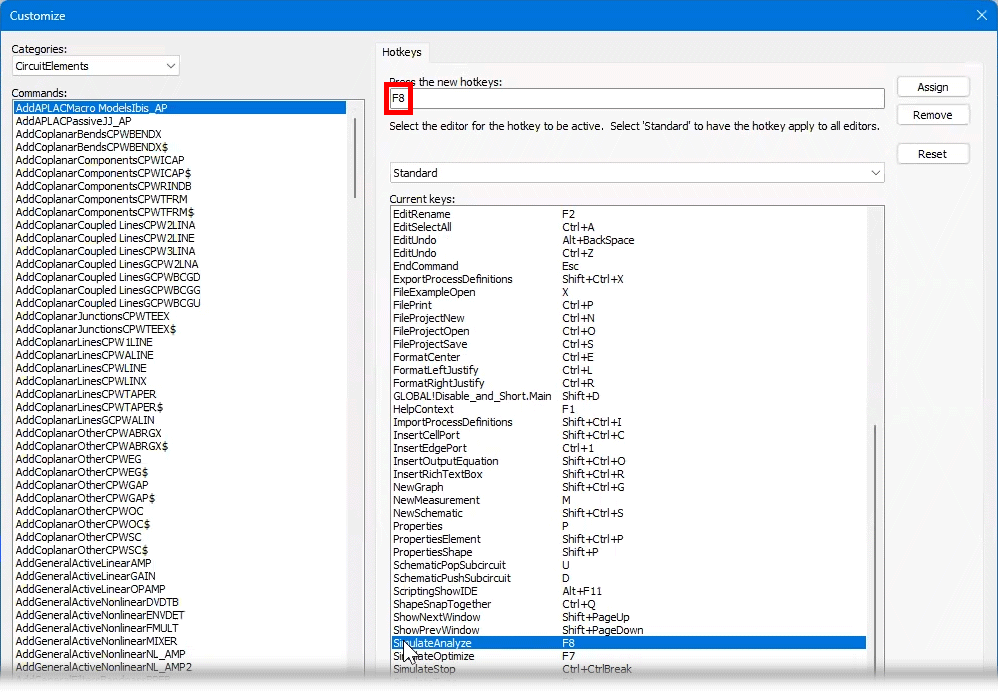
Step 15: View SimulateAnalyze in the Current Keys list. The hotkey is defined as F8 as previously shown in the menu.
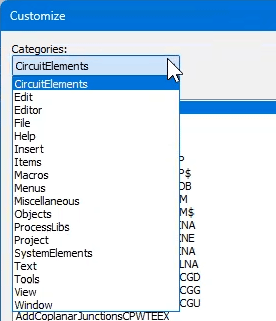
Step 16: Open the Categories drop-down menu for a list of available command categories.
Step 17: Select the desired command from the Command list.

Step 18: Select the Press the New Hotkeys field. Enter the desired keyboard shortcut for the command by pressing the corresponding keys on the keyboard.
Step 19: Click Assign to assign the shortcut. The shortcut can now be used to run the command at any time.
Step 20: Click OK to save the changes and close the window.
Wrap Up & Next Steps
Easily customize your AWR RF Simulation environment and workspace to increase productivity and optimize your design process in AWR. Learn more about AWR and request a free trial here. For more AWR how-tos, visit EMA Academy.
