Realistic simulations are required to ensure the functionality of your schematic designs. With this in mind, many manufacturers will create accurate spice models of their components for use in your simulation; however, they might not always be in the required format. With the Model Editor in PSpice you can create a custom PSpice model from text files or other models found on the internet.
This how-to will provide step-by-step instructions on how to create a PSpice Model using a text file and the PSpice Model Editor. To follow along, download the files above the Table of Contents.
How-To Video

Opening PSpice Model Editor
Step 1: Download the desired SPICE Model. Save the .txt file as a .lib file.
Note: To follow along with this blog, download the provide spice model: 2N6661_SPICE.lib.
Step 2: Open PSpice Model Editor 17.4 (Start > Cadence PCB Utilities 17.4-2019 > PSpice Model Editor 17.4).
Step 3: Select Capture as your Design Entry Tool and click Done.

Step 4: Select File > Model Import Wizard [Capture] from the menu.
Configuring the Model
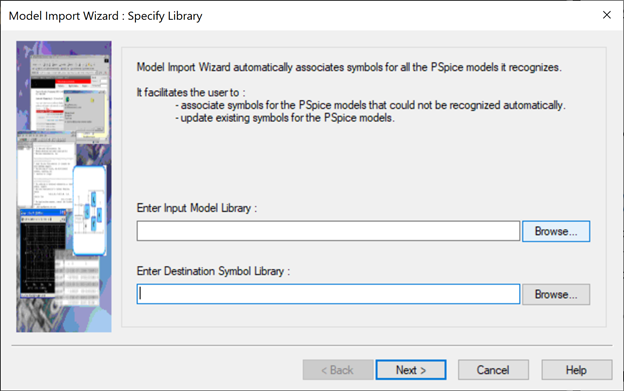
Step 5: Browse to Enter Input Model Library and select the newly created library file. Click Open and select Next.
Note: The Model Import Wizard has automatically identified a capture symbol to match the PSpice model based on the text.
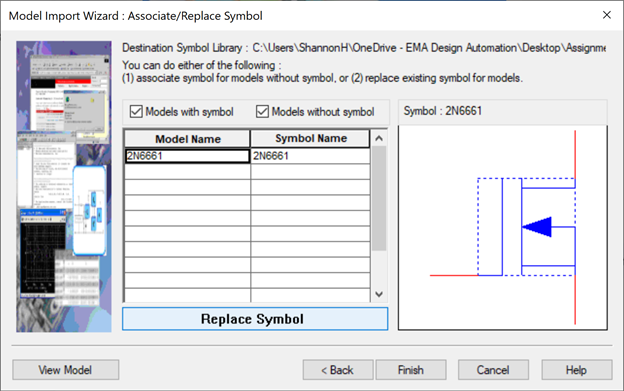
This can be changed by selecting Replace Symbol and browsing for the desired Capture symbol. If there is no symbol automatically identified select Associate Symbol. When replacing the symbol or associating a symbol follow the steps below:
1.Browse the PSpice Libraries for the desired symbol. You can select from the default PSpice libraries using the following path: C:\Cadence\SPB_17.4\tools\capture\library\pspice.
The Model Import Wizard will only show symbols that fit the model criteria based on the text.
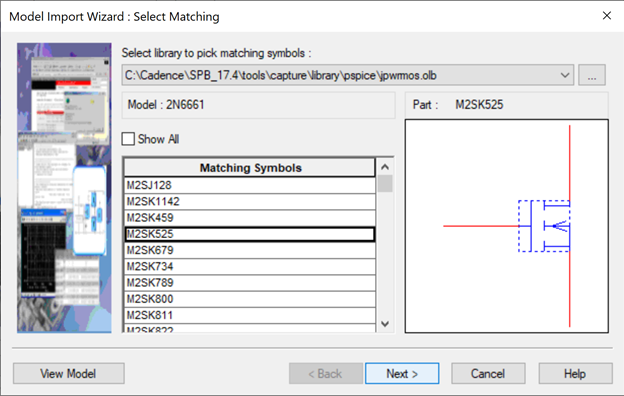
2. Select the desired symbol and click Next.
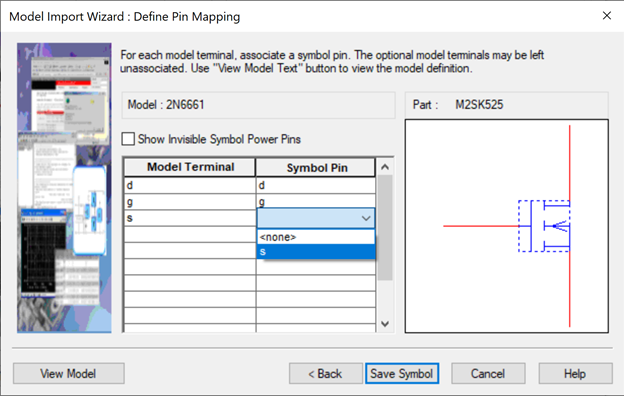
3. Map the Model Terminal to the Symbol Pin.
If you need to view the pin assignment or a description of the model, select View Model.
4. Select Save Symbol.
Step 6: Select Finish.
Note: An .olb file was generated and can be added to your PSpice libraries for easy part placement in the schematic.
Wrap Up & Next Steps
Incorporating manufacturer’s models in your PSpice simulation will provide a realistic view of the circuit functionality. The PSpice Model Import Wizard makes it easy to import, map, and associate these models to capture symbols for quick utilization in your schematic designs. To get the most out of PSpice, check out our walk-through tutorials. Don’t have PSpice? Test out these features and more with a free trial of OrCAD.

