Many modern circuits require simulations to guarantee functionality and optimize performance before production. Configuring the simulation settings can become time-consuming with specialized tolerances and specific operating conditions required to produce a real-world analysis. New in 23.1 is the ability to create a persona in PSpice containing simulation settings and reuse the settings across multiple designs and users, saving time and eliminating the need to configure the settings manually.
This quick how-to will provide step-by-step instructions on how to quickly reuse simulation settings and create a persona in PSpice Designer.
To follow along, download the provided files above the table of contents.
How-To Video
 Open in New Window
Create a Persona in PSpice
Step 1: Open File Explorer and enter %HOME% into the path bar.
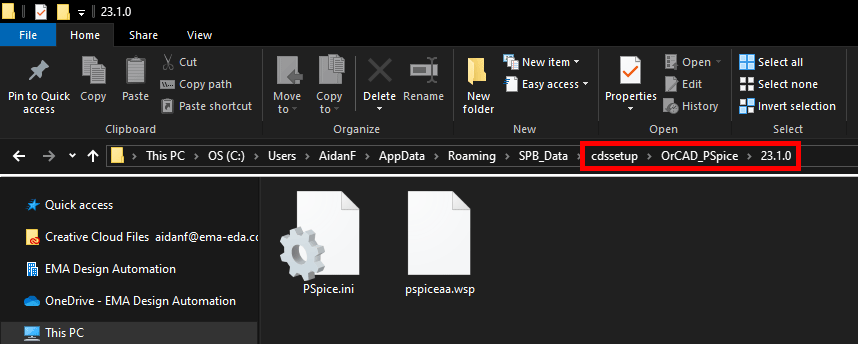
Step 2: From there, navigate to .\cdssetup\OrCAD_Pspice\[version].
Step 3: Open PSpice.ini in your preferred text editor.
Step 4: Scroll to the area between [PSPICE NETLIST] and [PSPICE DEMO]. The following personas are available with default configurations:
- GENERAL_RELAXED: Used for generic circuits with convergence errors
- SWITCHING_CIRCUITS: Used for Switched Mode Power Supply (SMPS) circuits
- DC_ANALYSIS: Used for DC analysis
- SEMICONDUCTOR_JUNCTION: Used for circuits with parasitic elements for semiconductors, such as Diodes and BJTs
- AUTOCONVERGENCE: Includes .autoconverge command options.
Note: If there are no PSpice Personas listed in the PSpice.ini file between the [PSPICE NETLIST] and [PSPICE DEMO] sections, perform the following steps:
- Navigate to C:/Cadence/SPB_23.1/tools/bin and open the PSpice.ini file
- Scroll down to the section labeled [PSPICE PERSONAS]
- Copy the default PSpice Personas with CTRL +C.
- Bring up the initial PSpice.ini file and paste the PSpice Personas between the [PSPICE NETLIST] and [PSPICE DEMO] sections with CTRL + V.

Step 5: View the default settings for the personas. The following syntax is used for the personas:
<Persona Name>=Option1=<value>,Option2=<value>, etc.
Note: These values can be modified based on your desired settings for simulations.
Step 6: Save and close the PSpice.ini file.
Running a Simulation Without a Persona
Step 7: Open the provided design in PSpice Designer.
Note: This design will produce a convergence error if the Autoconverge option, defined in the persona, is not set. Learn more about the autoconverge option here.
Step 8: Select PSpice > Run from the menu.
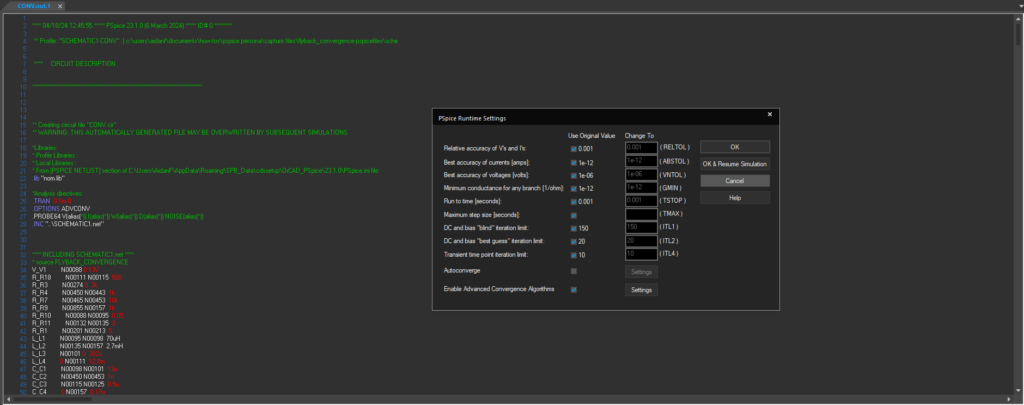
Step 9: The PSpice A/D window opens to show that the simulation has failed. The PSpice Runtime Settings window is also open, with the Autoconverge option unchecked. Leave the option unchecked and click Cancel to stop the simulation.
Step 10: Close the PSpice A/D window.
Step 11: A prompt will appear to stop the simulation. Click OK.
Adding a Persona to the Simulation
Note: To automatically converge the simulation, we’ll include the default autoconvergence persona in the simulation.
Step 12: Select Place > Text from the menu.

Step 13: The Place Text window opens. Enter the following text:
@PSpice:
.PERSONA AUTOCONVERGENCE
Note: Use CTRL+Enter to create a new line.
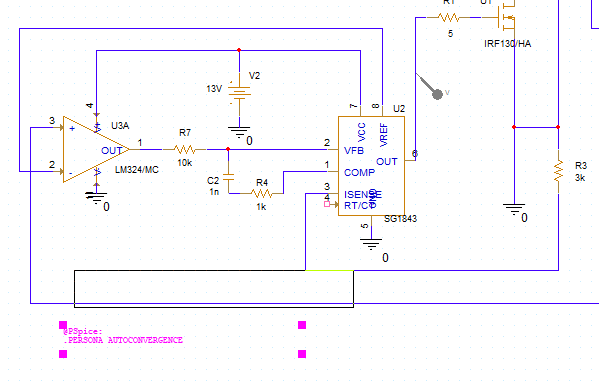
Step 14: Click OK and click to place the text in the schematic. Right-click and select End Mode.
Running the Simulation
Step 15: Select PSpice > Run from the menu.
Note: If prompted that a message occurred during simulation, click No to bypass the message summary and view the results.
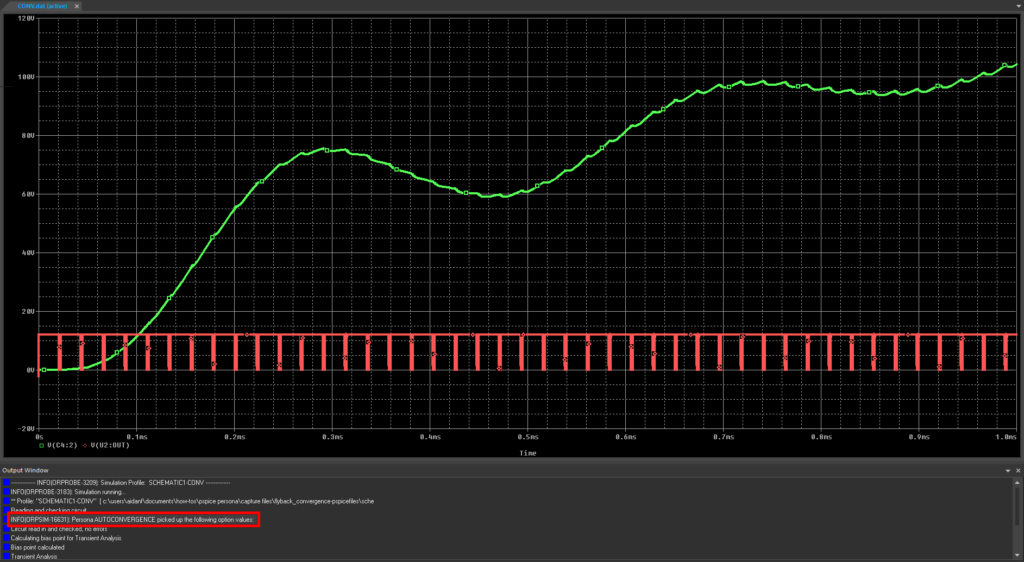
Step 16: View the simulation results. The simulation has run successfully because the autoconverge option was enabled by the persona as noted in the Output Window.
Step 17: Close the result window.
Create a New Persona in PSpice
Note: New personas can be added to the PSpice INI file to create a customized simulation persona and save time.
Step 18: Select PSpice > Edit Simulation Profile from the menu.
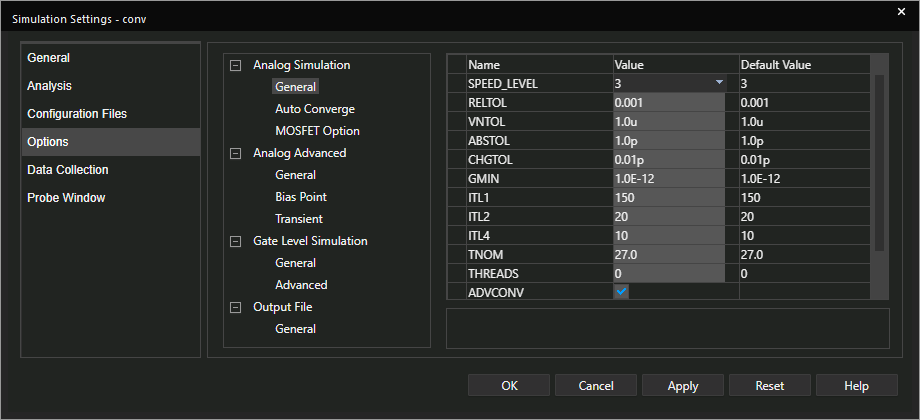
Step 19: Select Options. This table lists the options that are able to be set by persona. For this example, we will configure the following settings in a new persona:
- TRANCONV: Enables alternate path search if the simulation fails
- TRTOL: Time Step Tolerance
- ITL4: Number of Iterations
- TNOM: Nominal Temperature
- DIODECJO: Default Diode Junction Capacitance
- DIODERS: Diode Series Resistance
Note: Any parameter listed in the Simulation Settings window under Options can be included in a Persona. Select the option name in the Simulation Settings window for a description.
Step 20: Select Auto Converge under Analog Simulation.
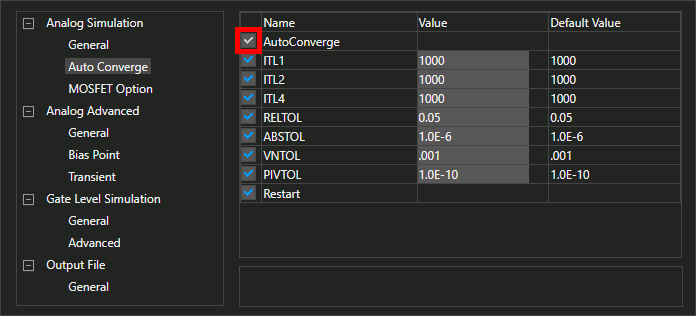
Step 21: Check the option for Autoconverge to enable the auto convergence feature.Click OK to save the settings and close the window.
Step 22: Reopen the PSpice.ini file under %home%\cdssetup\OrCAD_PSpice\[version] in a text editor.
Step 23: Start a new line at the end of the PSPICE PERSONAS section, just above PSPICE DEMO.

Step 24: Enter the following expression as the new line:
TRANSIENT=TRANCONV,TRTOL=5,ITL4=40,TNOM=25,DIODECJO=2p,DIODERS=1m
Note: This persona will automatically configure the following settings for a transient analysis:
- TRANCONV (enables alternate path search if the simulation fails)
- TRTOL: 5 (time step tolerance = 5%)
- ITL4: 40 (number of iterations = 40)
- TNOM: 25.0 (nominal temperature = 25°C)
- DIODECJO: 2p (default diode junction capacitance = 2pF)
- DIODERS: 1m (default diode series resistance = 1mΩ)
Step 25: Save and close the PSpice.ini file.
Step 26: Back in the schematic, double-click the persona text to change it.
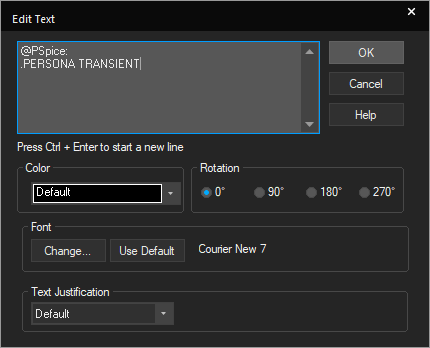
Step 27: Change the text to:
@PSpice:
.PERSONA TRANSIENT
Click OK.
Step 28: Select PSpice > Run from the menu.
Note: Personas do not determine the type of simulation. The type of simulation and run to time settings must be configured in the simulation profile.
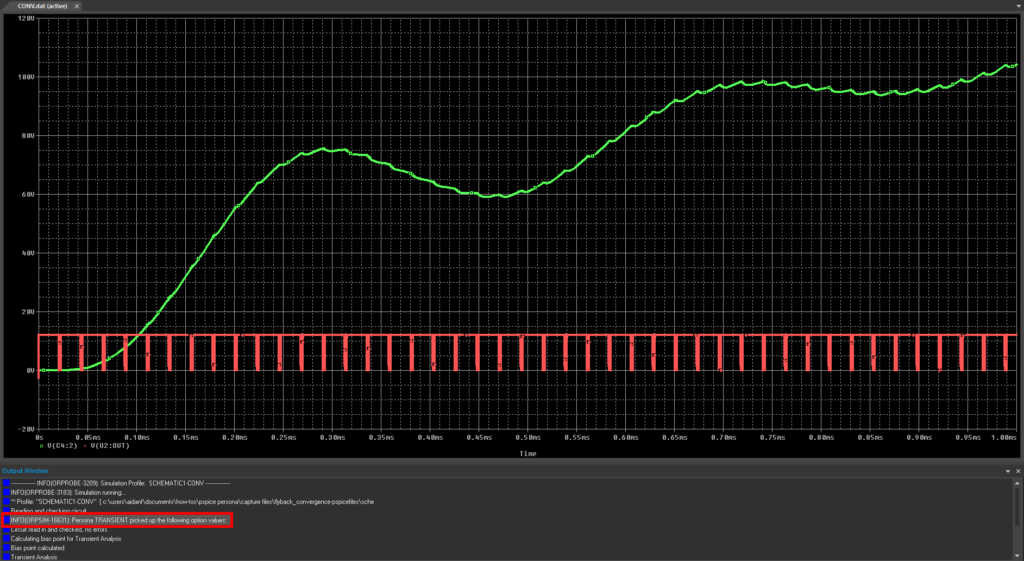
Step 29: View the simulation results. The TRANSIENT persona was run, as shown in the output window.
Wrap Up & Next Steps
Create a persona in PSpice to expedite circuit analysis by saving and reusing simulation settings across multiple designs and users. Upgrade to the latest 23.1 release or test out this feature and more with a free trial of OrCAD. For more how-tos, walk-throughs, and courses; visit EMA Academy.

