During the design process, it’s common for boards to go through multiple revisions. Managing these revisions and the associated documentation is crucial, as sending the incorrect version of a design to the PCB supplier can result in another fabrication, thousands of dollars wasted, and a delayed project. With OrCAD Engineering Data Management (EDM), the manufacturing package can be automatically created and zipped with each board revision ensuring the correct documentation is released to manufacturing.
This how-to will step you through package for release functionality using OrCAD PCB Designer 17.4 and OrCAD EDM to automatically create the desired manufacturing package.
How-To Video
Activating Package for Release
Step 1: Open the desktop version of OrCAD EDM or select EDM > Open OrCAD EDM in OrCAD PCB Designer.
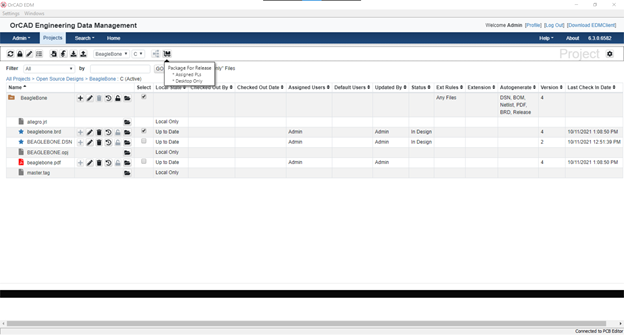
Step 2: Select the desired design in OrCAD EDM and select Package for Release.
Note: This will activate the package for release window to specify the desired settings for automatic creation and packaging of manufacturing documentation.
Configuring Package for Release
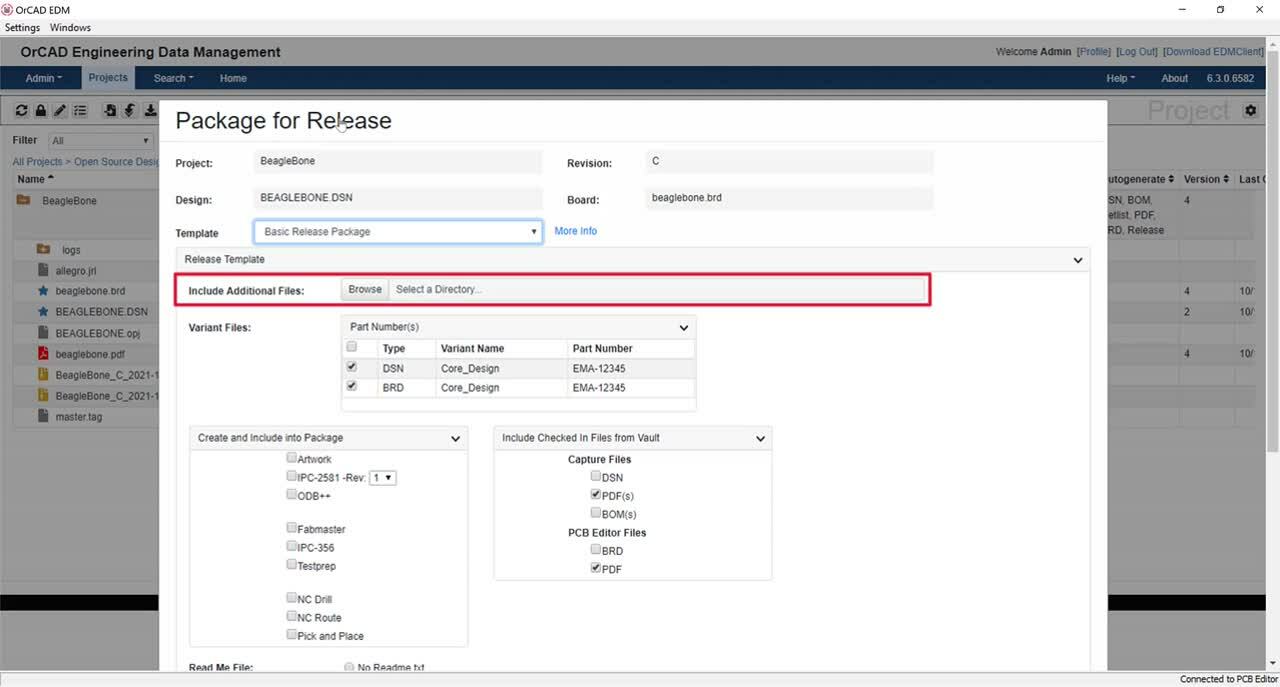
Step 3: Enter the project information and select the desired package for release template.
Note: Templates can be defined by an administrator by selecting Admin > Manage Templates > Release Templates.
Step 4: If necessary, Browse for any additional files that need to be included in the manufacturing package.
Step 5: Select the schematic, board, and any design variants that should be used to create the manufacturing data.
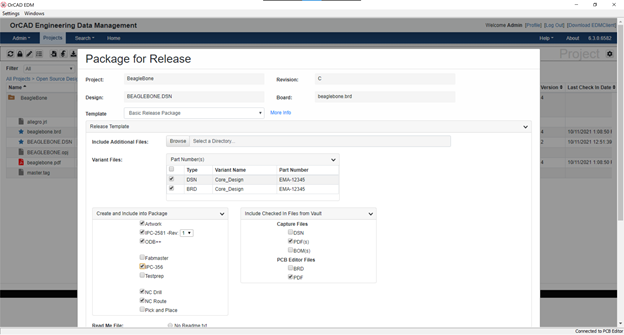
Step 6: Select the documentation to create and include in the manufacturing package.
Note: This allows you to automatically create several documentation formats with a single click including Gerber Artwork, IPC-2581, ODB++, Fabmaster, IPC-356, Testprep, NC Drill, NC Route, and Pick and Place files.
Step 7: Select the files to include from the EDM Vault.
Note: These files have been generated or updated with the check in of the design through OrCAD EDM. This includes the schematic design, BOM, PCB Design, and PDFs.
Step 8: Select to generate no read me file, a basic read me file, or a read me file from a template.
Note: The Basic Read Me file includes an itemized list of all the files generated during the package for release.
Step 9: Choose to include a release options summary and error/warning files or to check in the release package even when error/warning files are generated.
Manufacturing Package Generation
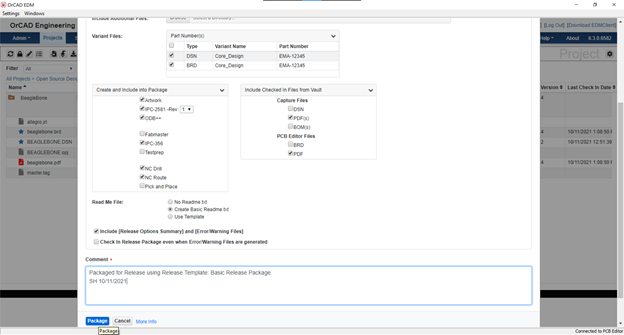
Step 10: Add a Comment and select Package.
Note: A zipped file was added to the project directory containing all the required manufacturing documentation.
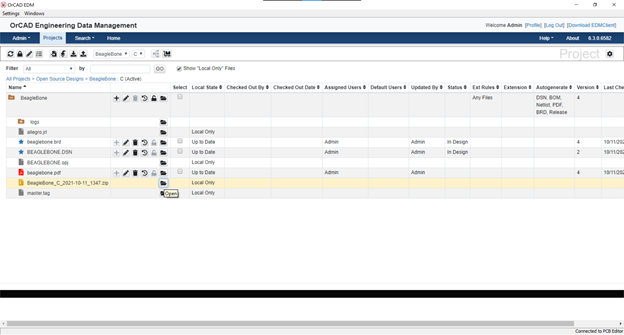
Step 11: Open the zipped folder to view the contents of the manufacturing package.
Note: If the design is modified, easily run package for release again to update the manufacturing documentation accordingly. Versions will be incremented when a new package for release is created.
Wrap Up & Next Steps
Manually managing revisions on all the documentation required to manufacture a PCB is tedious, time-consuming, and error prone. With OrCAD EDM’s automatic Package for release, you can be confident knowing the correct version of your PCB is manufactured the first time with the ability to easily generate the required manufacturing data, package files, and track revisions. Learn more about how to effectively manage your PCB Design Data with our free e-book.

