For consistency, reliability, and quality in the product design process, revisioning must be used to document versions of schematics and PCBs. Standards, such as American Society of Mechanical Engineers (ASME), can be used for:
- Version management
- Tracking changes
- Complying to standards
When users apply ASME revisioning, traceability is established throughout the design lifecycle and documentation becomes clearer. OrCAD X workspaces keep track of project revisions and allow designers to automatically apply ASME revisioning to projects.
This quick how-to will provide step-by-step instructions on how to apply ASME revisioning in OrCAD using workspaces in OrCAD X Capture CIS.
To follow along, download the provided files above the table of contents.
How-To Video
 Open in New Window
Create a Cloud Workspace
Step 1: Open the provided design, bandpass.dsn, in OrCAD X Capture CIS.
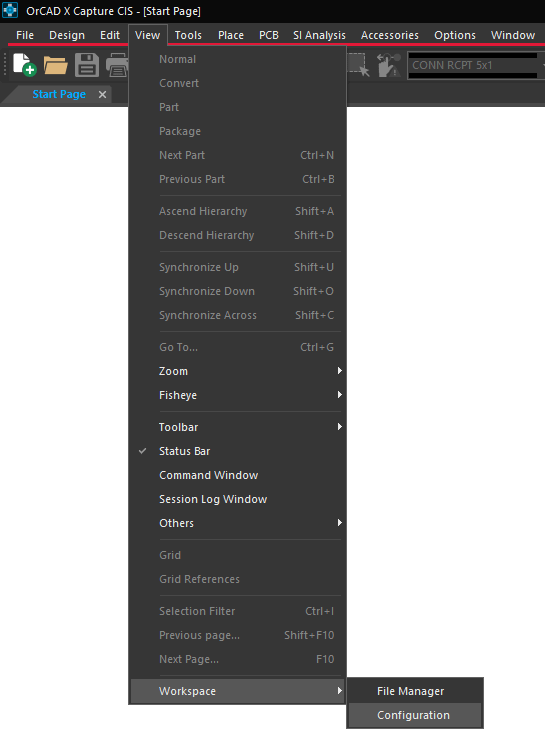
Step 2: Select View > Workspace > Configuration from the menu.
Step 3: The Workspace Configuration window opens. Ensure Cloud is selected as the CIS Data Source.
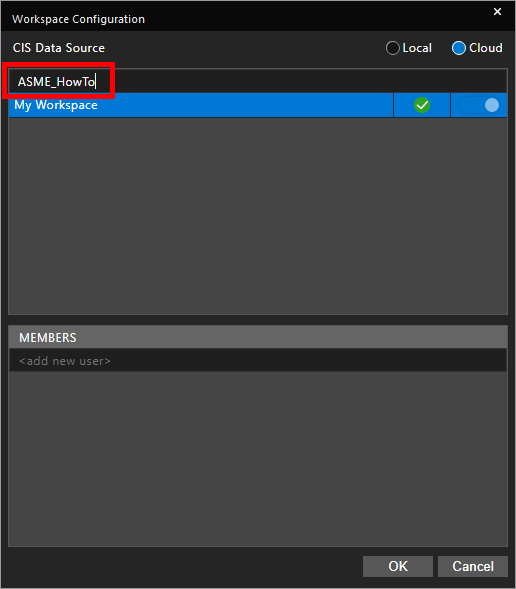
Step 4: Enter a name for a new workspace into the Add New Workspace field and press Enter. In this example, we will use ASME_HowTo.
Note: To learn more about how to create workspaces and assign team members, check out our how-to here.
Step 5: Click OK to save the workspace and close the window.
Configure the ASME Revisioning Options
Step 6: Select Options > Extended Preferences from the menu.
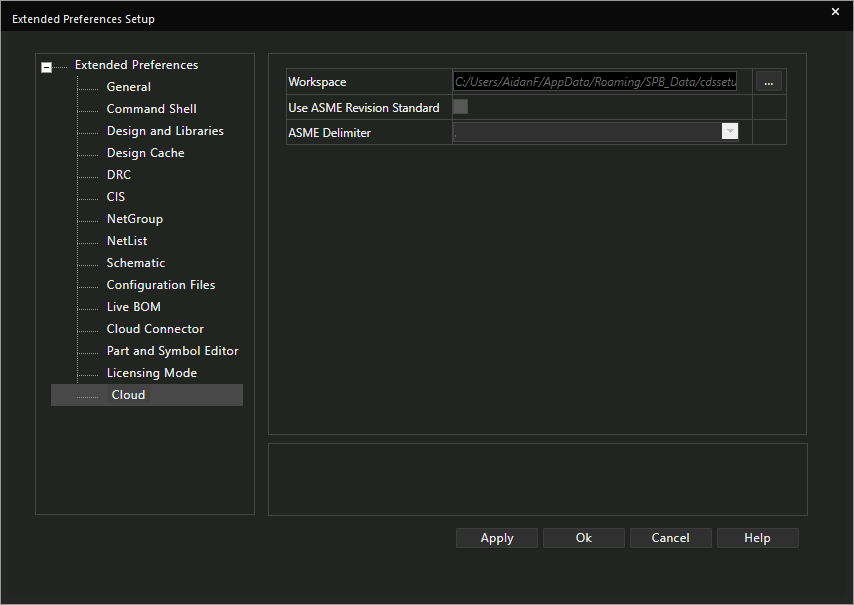
Step 7: The Extended Preferences Setup window opens. Select Cloud from the list on the left. From this window, you can configure numerous Capture options such as configuration file locations, licensing modes, and more.
Step 8: Check Use ASME Revision Standard. A prompt appears that this change will require the Component Explorer and File Manager windows to be reopened. Since neither window is open, ignore this warning and click OK.
Note: From the ASME Delimiter dropdown, you can select the desired delimiter character between the major and minor revision. Available options include:
- Hyphen (-)
- Period (.)
- Comma (,)
- Underscore (_)
Step 9: Click OK to save the settings and close the window.
Apply ASME Revisioning in OrCAD
Step 10: Right-click the .dsn file in the Project Manager and select Add to Workspace.
Note: This will save the project files to the cloud workspaces, which can be found in your default project folder: %HOME%\cdssetup\workspace\projects.
Step 11: Close the Project Manager to close the project.
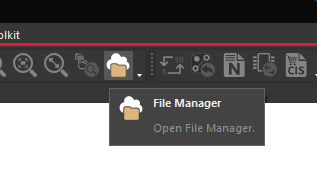
Step 12: Select the File Manager icon from the toolbar.
Step 13: The File Manager tab opens. Expand Workspaces > My Workspace and select Projects.
Step 14: The Bandpass project is listed. Right-click the project and select Publish.
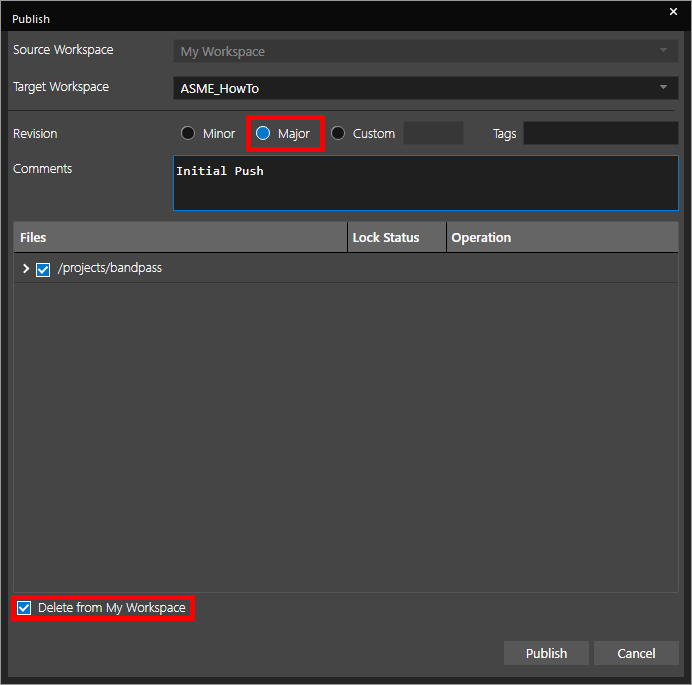
Step 15: The Publish window opens. ASME_HowTo is already selected as the target workspace. Set the revision to Major, check Delete from My Workspace, and add a comment if desired.
Step 16: Click Publish. The project is removed from the My Workspaces folder.
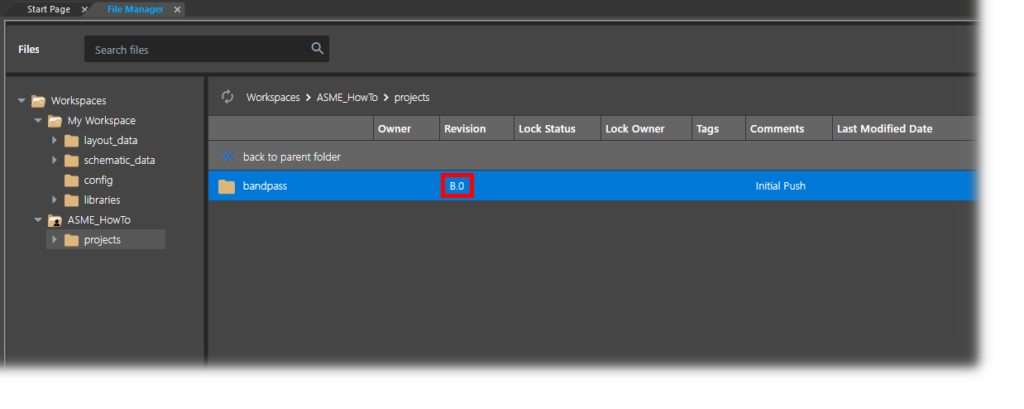
Step 17: Expand Workspaces > ASME_HowTo and select Projects. Bandpass is listed as a project with the revision number set to B.0, as per the ASME standard.
Note: Learn more about checking in and checking out projects for editing in our how-to here.
Revert to Revision Numbers
Note: The revision format can be changed even after the design is published.
Step 18: Select Options > Extended Preferences from the menu.
Step 19: In the Extended Preferences Setup window, select the Cloud category.
Step 20: Uncheck Use ASME Revision Standard.
Step 21: A prompt appears that the File Manager window will need to be closed and reopened. Click OK.
Step 22: Click OK to close the setup window.
Step 23: Close the File Manager tab.
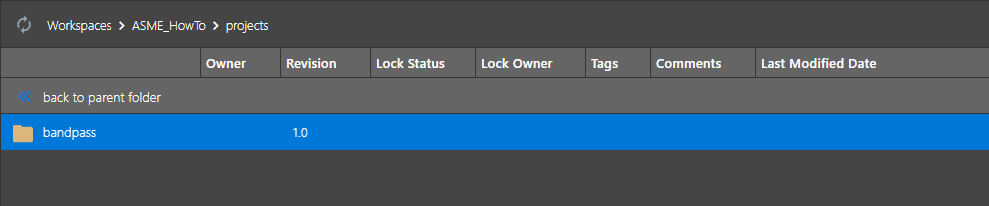
Step 24: Select the File Manager icon to reopen the tab. Select the ASME_HowTo > Projects folder. The revision number of Bandpass has reverted to 1.0.
Wrap Up & Next Steps
Quickly and easily apply ASME revisioning in OrCAD using workspaces to improve consistency and traceability of your PCB designs with OrCAD X Capture CIS. Test out this feature and more with a free trial of OrCAD.
Want to learn more about OrCAD X? Get access to free how-tos, courses, and walk-throughs at EMA Academy.
