Choosing the right parts for a circuit is as important as making the right connections. When using a component database, determining which parts are approved or rated for their application in your design isn’t always obvious. The CIS Row Color App can be used to color code parts in OrCAD and highlight rows in your component database based on specific data fields for quick identification of parts. The CIS Row Color App is included in the EMA Toolkit as part of the EMA Support + program and can be used to quickly identify:
- Components that meet specific design requirements
- Voltage rating
- Operating temperature
- Value
- Tolerance
- Approved components
- Component status based on lifecycle
This quick how-to will provide step-by-step instructions on how to color-code parts in OrCAD X Capture CIS with the CIS Row Color App included with the EMA Toolkit.
To follow along, download the provided files above the table of contents.
How-To Video
 Open in New Window
Activate the CIS Database
Note: To use the CIS Row Color App, a CIS database must first be configured. OrCAD CIP can be used to configure and manage your CIS database efficiently.
Step 1: Select Place > Database Part from the menu.
Note: If this option is not listed, select the schematic page first. If a Login window opens, enter your login ID and password or check Use Trusted Connection. Click OK.
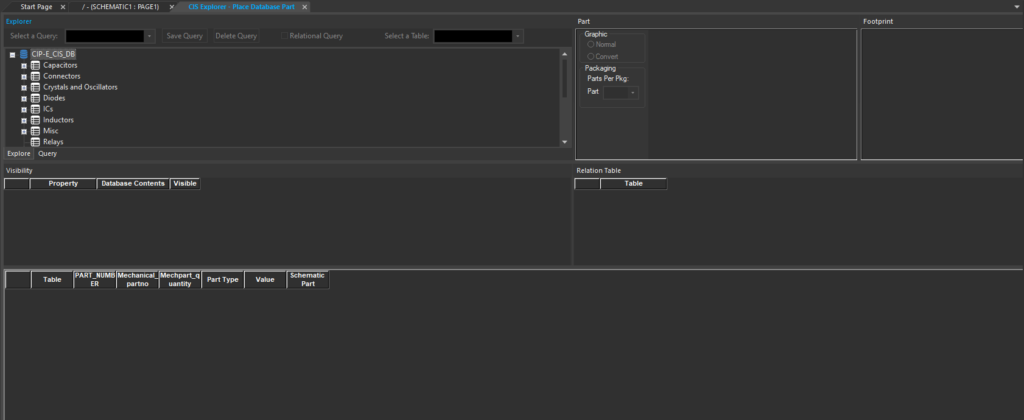
Step 2: The CIS Explorer tab opens. Expand the database in the Explorer table.
Note: This how-to will use the CIS database included with CIP. The following instructions may vary based on your configured part database.

Step 3: Expand Capacitors then select EMA > Ceramic > SMD > 0603. The list of available capacitors is shown with detailed component properties.
Step 4: Close the CIS Explorer tab.
Configure the CIS Row Color App
Note: The CIS Row Color App will color code parts in OrCAD by highlighting rows based on defined properties to quickly identify parts in CIS.
Step 5: Select EMA Toolkit > CIS Row Color from the menu.
Step 6: The CIS Row Color app opens. Here you can configure the desired properties, values, and colors to highlight specific components in the CIS database.
Step 7: Select Rated Power under Field.
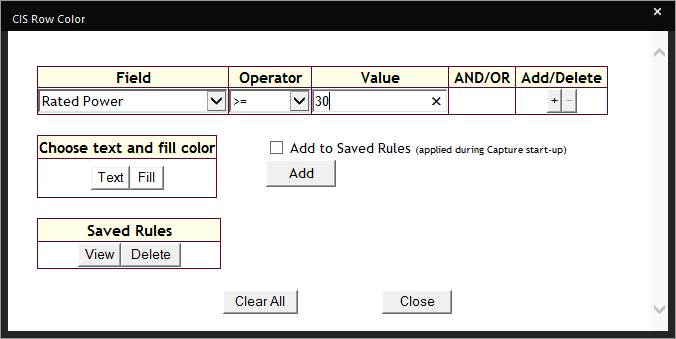
Step 8: Select >= from the Operator drop-down menu and enter 30.
Step 9: Select + under Add/Delete. A new row is added.
Step 10: From the AND/OR dropdown, select AND.
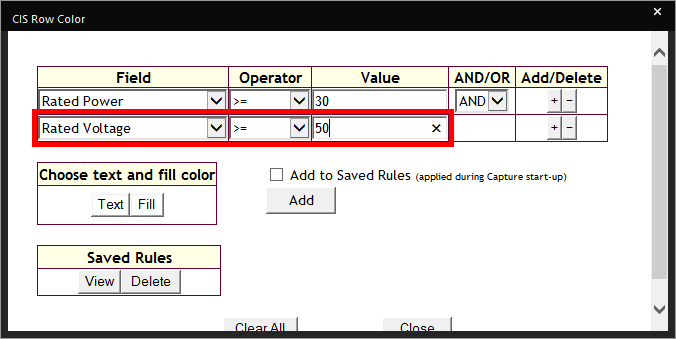
Step 11: In the new row, set the following options:
- Field: Rated Voltage
- Operator: >=
- Value: 50
Note: This will color code parts in OrCAD with a power rating greater than or equal to 30W and a rated voltage greater than or equal to 50V.
Step 12: Under Choose Text and Fill Color, select Text.
Step 13: Select a shade of green from the color selection window and click OK.
Step 14: Select Fill and choose a darker shade of gray from the color selection window. Click OK.
Note: If running OrCAD Capture in light mode, choose white for the Fill. Color selection for Text may vary for improved visibility.
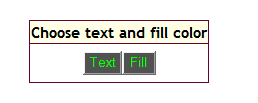
The Text and Fill buttons will change colors to preview the chosen colors.
Step 15: Click Add to create the rule.
Step 16: A prompt will appear that the rule was applied successfully. Click OK.
Note: Check Add to Saved Rules to use the rule for all future Capture sessions. Select Clear All to remove all applied rules.
Step 17: Click Close to close the app.
Color Code Parts in OrCAD
Step 18: Select Place > Database Part from the menu. Enter your login credentials and click OK.
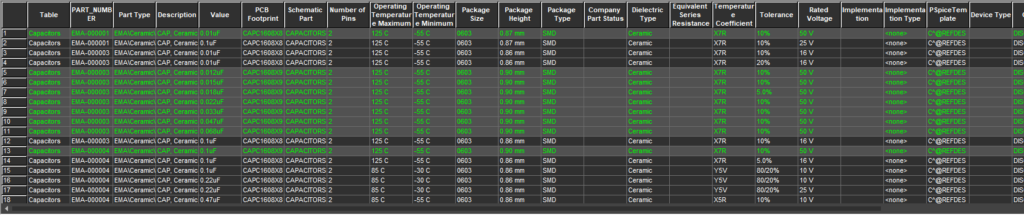
Step 19: Expand Capacitors > EMA > Ceramic > SMD and select 0603. All capacitors with a voltage rating of 50V or higher are now highlighted in green.
Step 20: Expand Transistors > EMA > MOSFET and select SMD. All transistors with a power rating of 30W or higher are highlighted.
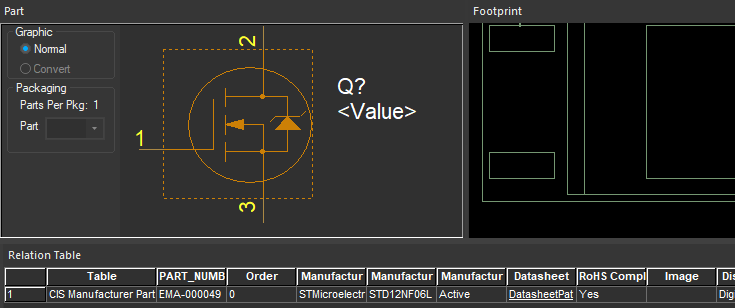
Step 21: Select one of the highlighted N-channel MOSFETs from the list. The part symbol and footprint are shown.
Step 22: Double-click to attach the part to your cursor.

Step 23: Click to place the part in the schematic. Right-click and select End Mode.
Wrap-Up and Next Steps
Quickly color code parts in OrCAD to determine which parts are usable in your component database with the CIS Row Color App in OrCAD X Capture CIS. Test out this feature and more with a free trial of OrCAD.
Want to learn more about Capture? Get access to free how-tos, courses, and walk-throughs at EMA Academy.

