One of the biggest annoyances in any SPICE-based simulator occurs when you run a simulation and receive back a convergence error with loads of node voltages and currents to sift through and figure out where it all went wrong. It stops your simulation dead in its tracks and requires you to loosen the tolerances in the simulation in order to continue on.
When manually loosening the tolerances, it’s hard to know what to do. If the tolerance loosening doesn’t work on the first try, you can try again until it does and if it eventually does simulate you may be unsure of the accuracy on your results from all the loosening that you’ve done.
In PSpice, when you run into a Convergence error, you’re presented with a dialog that looks like this:
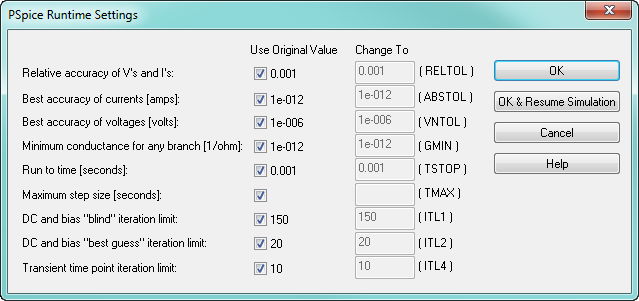
In this dialog, you can choose to loosen some of the available parameters (RELTOL, ABSTOL, VNTOL, GMIN, TSTOP, TMAX, ITL1, ITL2, ITL4). But which ones would be effective to loosen and by what magnitude should they be changed without ruining the results? It’s hard to know and typically takes a deal of experience and a little bit of luck to get past these and still have meaningful results when completed.
In 16.0 (June 2007), Cadence introduced to PSpice one of the best features that they’ve ever put in the tool, AutoConverge. With AutoConverge, you can skip the whole manual tolerance changing dialog altogether and let the tool determine the best tolerance settings.
It flew under the radar for users because it took a bit of digging to see that it could be turned on. You needed to go to your Simulation Settings > Options Tab and select the Autoconverge… button at the bottom.
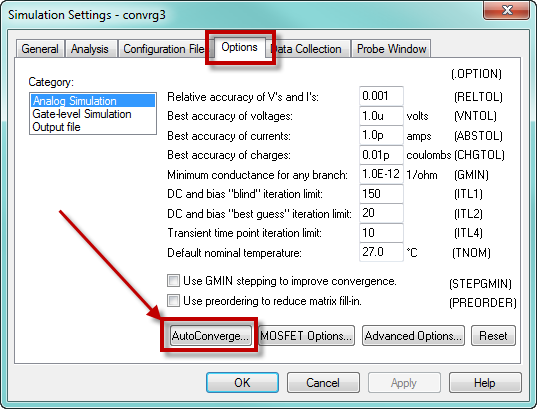
This brought up a dialog that allowed you to turn on AutoConverge and specify some tolerance limits for the AutoConverge function to stay within (ITL1, ITL2, ITL4, RELTOL, ABSTOL, VNTOL and PIVTOL).
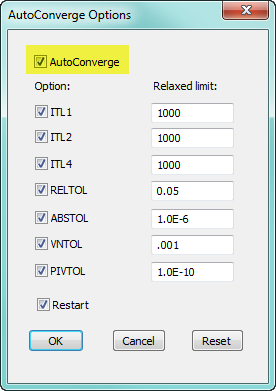
What this did is specify that if the simulation runs into trouble with the default tolerances that you’ve given it, it allows the AutoConverge function to start loosening the tolerances up to the limit specified in this dialog. AutoConverge does NOT just take all the tolerance space that you give it but instead chips away at the tolerances to determine how to loosen the tolerances by the smallest amount and achieve convergence.
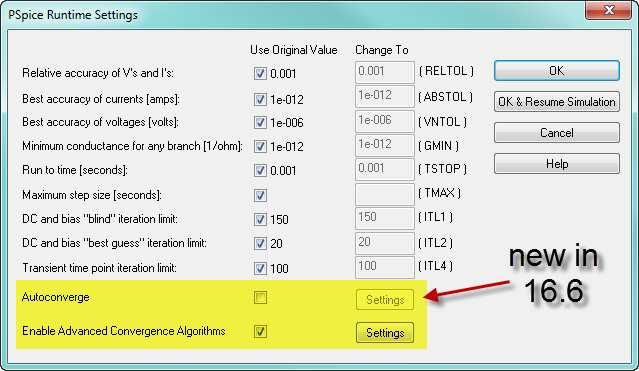
In 16.6 (Oct 2012), this feature was brought more to the forefront so that when a convergence error popped up during your simulation there is an AutoConverge button right there to allow you to turn on the AutoConverge function and specify its limitations (Settings) without having to back out and go into your simulation profile to turn it on.
Often, turning the AutoConverge on will whip you right through the convergence issue that you are having and present you with waveforms but what did it do to get you past? Are the results accurate?
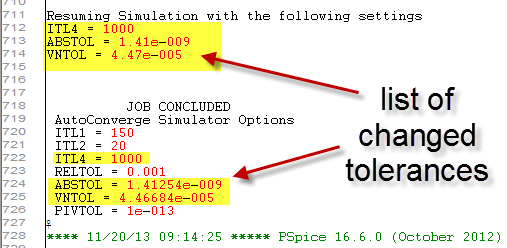
If you want to know what the AutoConverge function did, all you need to do is go to View > Output File in PSpice and scroll to the bottom of the file where it will let you know exactly what tolerance settings were changed and what value they were changed to so you can evaluate the correctness of the results.
The best part about AutoConverge is that it gets you past the wall of convergence errors and allows you to look at some waveforms to see if they’re what you were expecting. This is much better than needing to figure out manually what you should loosen your tolerances to and hoping that it works.
AutoConverge is an amazing feature for both new and experienced users and should allow you to get back to designing instead of fiddling with software