Lesson 9: Save As and Archive
Course Info
PSpice 22.1 Walk-Through
Useful Links
Want to save your progress and be able to pickup where you left off?
Login or Register for a free EMA-EDA.com account
This walk-through demonstrates the Save As and Archive features in OrCAD PSpice Designer 22.1. After you complete this topic, you will be able to:
- Use the Save As functionality
- Archive a PSpice project
To follow along, continue with the design from the previous topic or use the provided materials.
If materials were not downloaded at the beginning of the walk-through, files for this lesson can be accessed through the materials tab above.
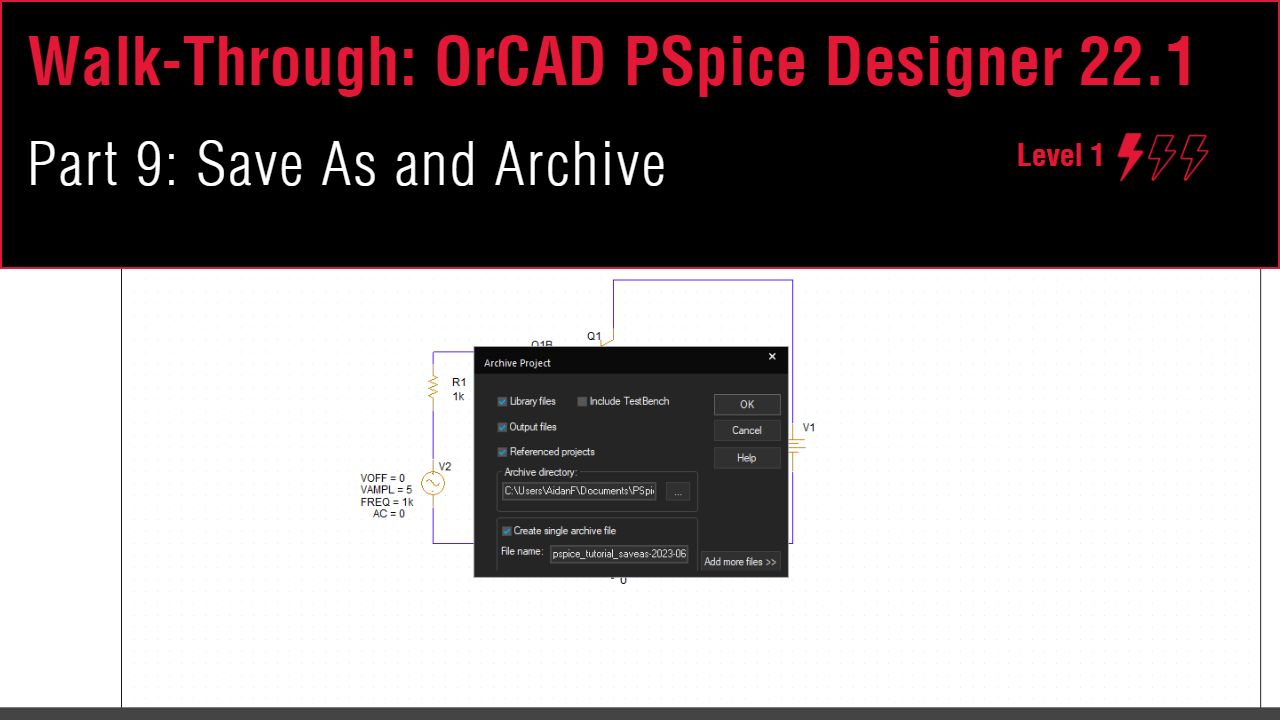 Open in New Window
Using the Save As Function
Step 1: Select Design Resources in the Project Hierarchy.
Step 2: Select File > Save Project As from the menu to open the Save Project As window.
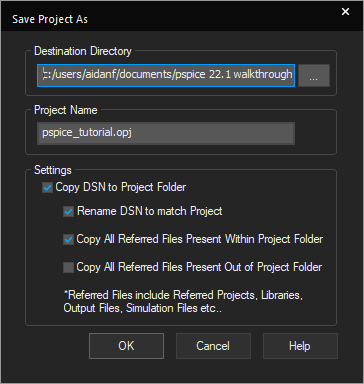
Step 3: Select the ellipsis for Destination Directory to open the file browser.
Step 4: Browse for a location to save the files and click Select Folder.
Note: The save as location cannot be within your own project folder.
Step 5: Enter a name for the project in the Project Name field.
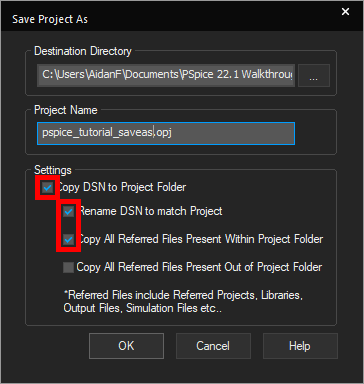
Step 6: Ensure the following options are selected:
- Copy DSN to Project Folder
- Rename DSN to match Project
- Copy All Referred Files Present Within Project Folder
Step 7: Click OK to save the project.
Note: Creating a new project enables you to preserve the original project while you continue to update your new project.
Archiving the Project
Step 8: Select File > Archive Project from the menu.
Note: This option compresses all required PSpice files into a single zip file. This enables you to easily share your schematics and simulation files with colleagues.
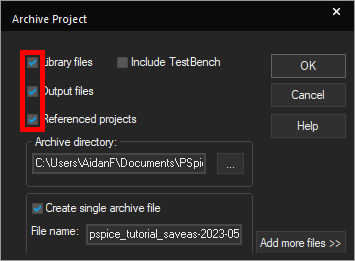
Step 9: Check the options for
- Library Files
- Output Files
- Referenced Projects
Step 10: Select the ellipsis for Archive Directory.
Step 11: Browse to a location to save the Zip file and click Select Folder.
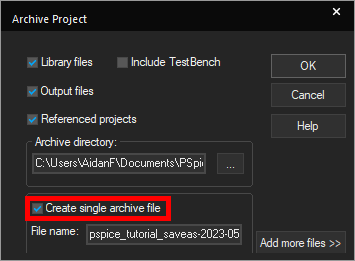
Step 12: Check the option to Create Single Archive File.
Note: If this option is not selected, the design files will simply be copied to the destination folder.
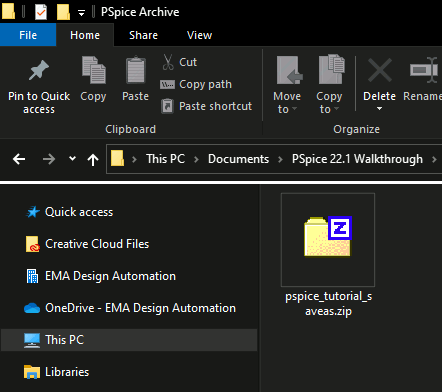
Step 13: Click OK to generate the Zip file. The Zip file is saved in the selected folder.
