Cloud Workspace Configuration
This walk-through demonstrates how to configure workspaces and connect your project to local or cloud workspace in OrCAD X Capture 23.1. This will allow for easy sharing of the library and design with team members for efficient collaboration. After you complete the topic, you will be able to:
- Create a workspace
- Configure a local or cloud workspace
- Add users to a workspace to create a shared access to files and libraries
To follow along, continue with the design from the last topic or use the provided design files. If the design files were not downloaded in the beginning of the Capture Walk-Through, the design files for this lesson can be found under the Materials tab.
 Open in New Window
Creating a Cloud Workspace
Step 1: Open the provided or continued design in OrCAD X Capture CIS.
Note: Make sure to launch OrCAD X Capture CIS with a license of OrCAD X Professional. If prompted, log in with your Cadence username and password. OrCAD X Professional enables team-based workspaces for file and library sharing.
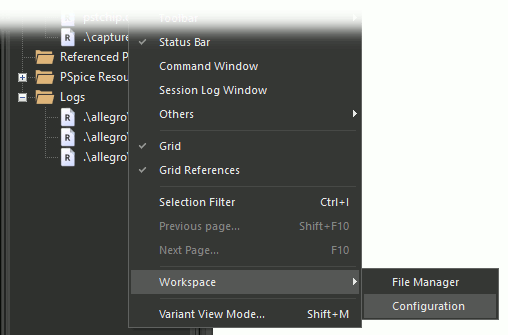
Step 2: Select View > Workspace > Configuration from the menu. The Workspace Configuration window opens.
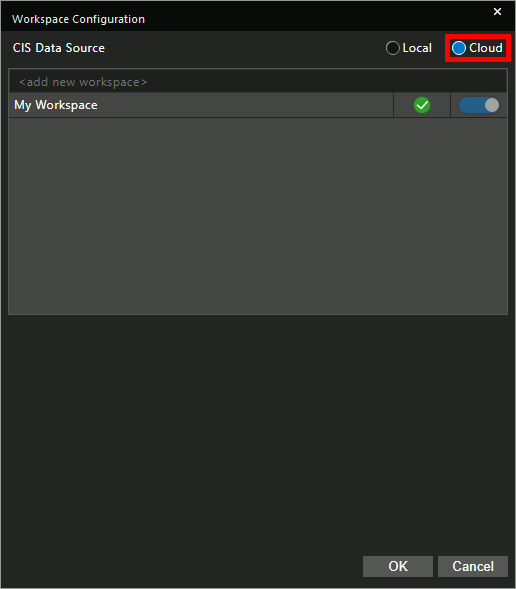
Step 3: Select Cloud for CIS Data Source.
Note: Select Local to work with the existing CIS database.
Step 4: Enter the name Engineering into the Add New Workspace text field. Press Enter to create the workspace.
Adding Users to a Workspace
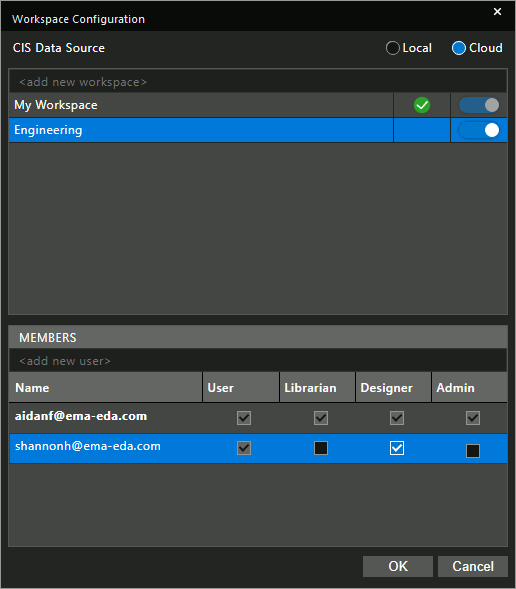
Step 5: Your Cadence user profile is automatically added to the Members list at the bottom of the window. Enter the username of a team member to add the user to the workspace. Press Enter.
Note: The username must match the Cadence email account.
Step 6: Configure the user roles with the checkboxes. The following roles are available:
- Admin: Has complete access to all objects in a shared workspace and can perform any possible task.
- Designer: Can check in or check out a design to update and modify it.
- Librarian: Has part authoring, editing, and publishing capabilities.
- User: Provides read-only access to objects in a shared workspace.
Note: The creator of a workspace always has a full admin role.
Step 7: Right-click the new workspace and select Set as Default.
Note: The green checkbox moves from My Workspace to Engineering, indicating that it is now the default workspace.
Step 8: Click OK to save the settings and close the window.
With a workspace configured, it can now be used to share libraries and design files with team members for efficient cloud-based collaboration.