Cloud-Based File Management
This walk-through demonstrates how to share, manage, and edit design files in cloud workspace in OrCAD X Capture 23.1. Managing a design in cloud workspace enables teams to collaborate and keeps the design up to date for all team members. After you complete the topic, you will be able to:
- Upload a design to a workspace
- Check out and edit a design within a workspace
To follow along, continue with the design from the last topic or use the provided design files. If the design files were not downloaded in the beginning of the Capture Walk-Through, the design files for this lesson can be found under the Materials tab.
 Open in New Window
Adding a Design to a Workspace
Step 1: Open the provided or continued design in OrCAD X Capture CIS.
Note: Be sure to open OrCAD X Capture CIS with a license of OrCAD X Professional. OrCAD X Professional enables the sharing of design and libraries through cloud-based workspaces.
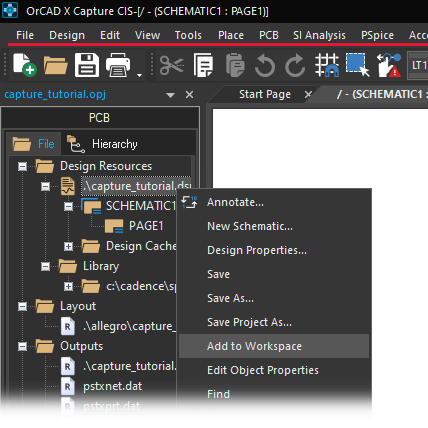
Step 2: Right-click the .dsn file in the Project Manager and select Add to Workspace. The project is added to your local workspace.
Step 3: Close the Project Manager to close the project.
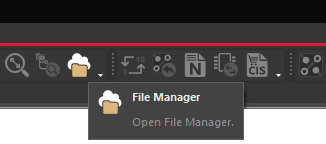
Step 4: Select File Manager from the toolbar. The File Manager tab opens.

Step 5: Under Workspaces, expand My Workspace and select Projects. The project folder capture_tutorial is listed.
Step 6: Right-click the capture_tutorial folder and select Publish.
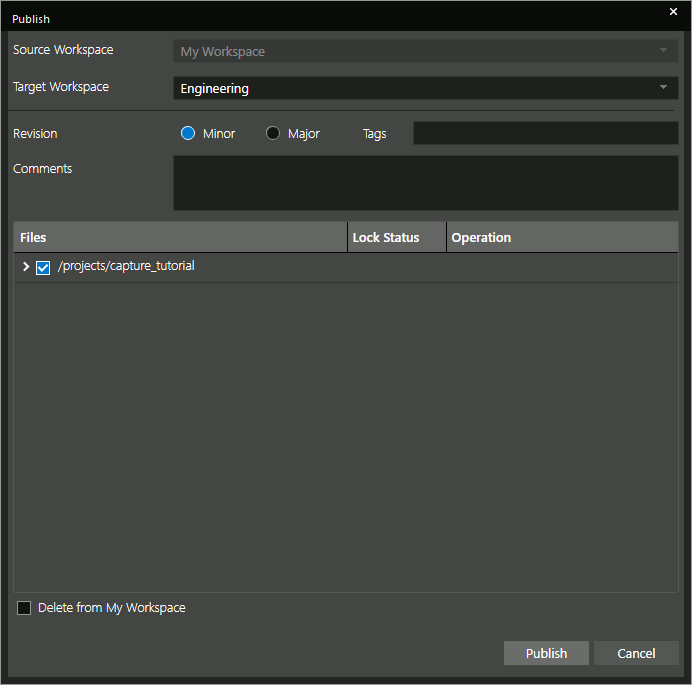
Step 7: The Publish window opens. Engineering has already been selected as the target workspace since this was previously selected as the default. Select Major for the Revision to publish the first revision as 1.0. Enter any desired comments under Comments.
Note: Check Delete from My Workspace to remove the project from your personal workspace.
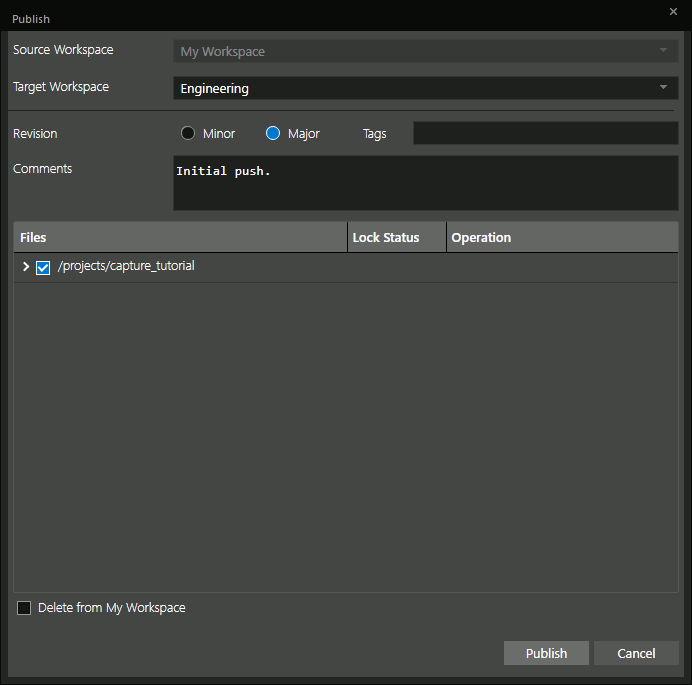
Step 8: Click Publish to move the project to the Engineering workspace.
Note: Other team members can now check out the project and edit it.
Step 9: Expand the Engineering folder and select Projects. A folder for capture_tutorial is listed.
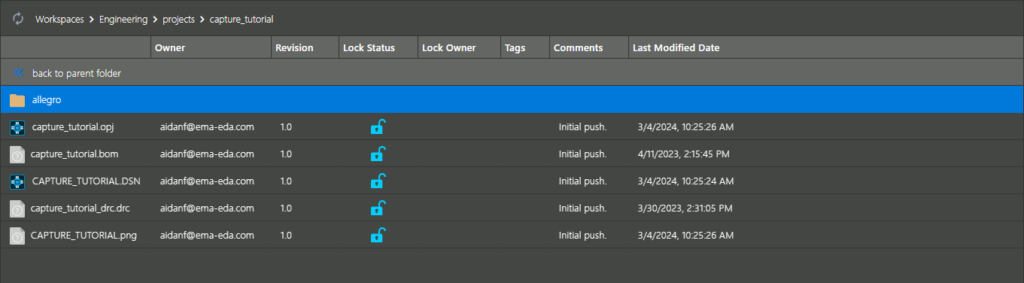
Step 10: Double-click the capture_tutorial folder to open it. All project files are listed with the revision number and an “unlock” symbol to indicate that the project is checked in and can be edited.
Locking and Editing a Project
Note: Any designer or admin can lock a project in the cloud workspace to be edited.
Step 11: Select the Engineering > Projects folder in the File Manager.
Step 12: Right-click the capture_tutorial project and select Edit.
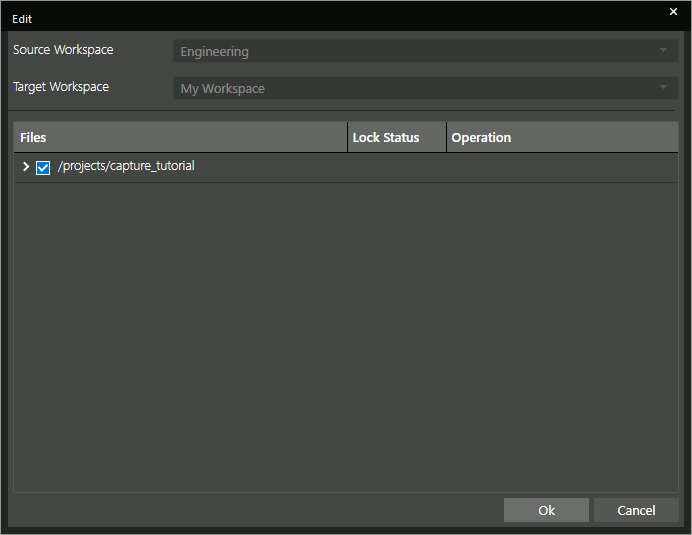
Step 13: The Edit window opens with your personal workspace automatically selected. Click OK. The project has been checked out.
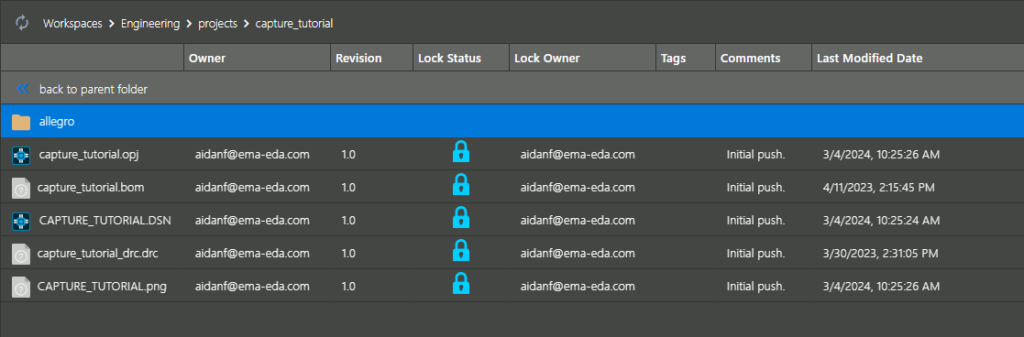
Step 14: Select the capture_tutorial folder. A “lock” symbol is now shown along with your Cadence ID, indicating that the project has been checked out and locked.
Step 15: Select My Workspace > Project > capture_tutorial in the workspace hierarchy.
Step 16: Double-click the capture_tutorial.opj file to open the project. The completed project is opened as before and the project can now be modified as normal.
Step 17: After modifying the project, close the Project Manager and open the File Manager.
Step 18: Select Workspaces > My Workspace > projects from the workspace manager.
Step 19: Right-click capture_tutorial and select Publish.
Step 20: Set the revision to Minor and enter any desired comments. Click Publish.
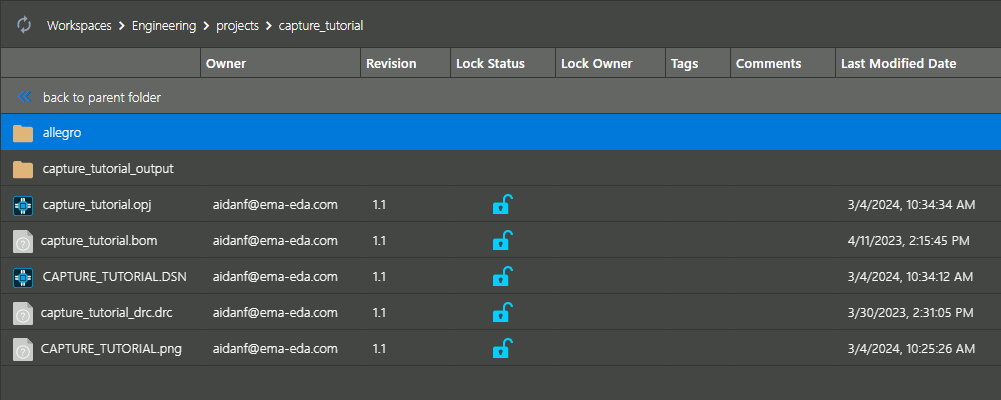
Step 21: Select the Engineering > Projects > capture_tutorial folder. All project files are now shown as unlocked with the revision number incremented, and comments added.